Easy No-Bake Cereal Bars – Quick & Delicious Treats
Cereal bars are an absolute game-changer for busy mornings and afternoon slumps! There’s just something incredibly satisfying about a perfectly chewy, undeniably delicious bar packed with wholesome goodness. We all love them because they’re the ultimate grab-and-go breakfast or snack – no fuss, no mess, just pure, portable pleasure. What makes these homemade cereal bars truly special is their incredible versatility and the ability to customize them to your exact taste. Forget those store-bought versions that are loaded with sugar and questionable ingredients. With just a few simple pantry staples, you can create cereal bars that are not only healthier but also bursting with flavors you’ll adore. Get ready to ditch the bland and embrace the brilliantly delicious!
The Ultimate Homemade Cereal Bars: A Quick and Easy Treat
There’s something incredibly satisfying about a homemade treat that’s both delicious and surprisingly simple to whip up. Today, we’re diving into the world of cereal bars – a nostalgic favorite that’s perfect for breakfast on the go, a post-workout refuel, or just a sweet little pick-me-up any time of day. Forget those store-bought options laden with artificial ingredients; these homemade bars are packed with wholesome goodness and can be customized to your exact liking. The beauty of this recipe lies in its adaptability. Whether you’re a fan of crunchy flake cereals, chewy oat clusters, or even something a bit more adventurous, you can tailor these bars to be exactly what you crave. We’re talking about a no-bake wonder that comes together in minutes, leaving you with a batch of delightful bars that will disappear faster than you can say “snack time!”
Ingredients:
Making Your Cereal Bars
Let’s get down to business! This recipe is incredibly forgiving, making it perfect for even the most novice bakers (or non-bakers, as the case may be!). The base is simple: your favorite cereal, a binding agent, and a touch of sweetness. I often reach for a classic crispy rice cereal for its light texture and satisfying crunch, but feel free to experiment! Toasted oat clusters add a wonderful chegrape juicess, while a granola with nuts and seeds can elevate the nutritional profile and flavor. The choice is yours!
Step 1: Prepare Your Cereal
Start by measuring out 3 cups of your chosen cereal. If you’re using a larger, chunkier cereal, you might want to give it a gentle crush with your hands or a rolling pin. We’re not looking for dust here, just smaller pieces that will hold together better in the bar. This also helps to ensure a more uniform texture throughout your finished bars. If your cereal is very fine, like some puffed rice varieties, you might not need to do this step. The goal is to have pieces that can be coated evenly by the binder.
Step 2: Warm the Binder
In a medium saucepan, combine your 2/3 cup of peanut butter (or your preferred nut butter like almond, cashew, or sunflower seed butter) with 1/2 cup of your chosen liquid sweetener. This could be agave nectar, honey, or brown rice syrup. If you’re opting to add the optional 1/2 teaspoon of salt, stir it in now. Gently heat this mixture over low heat, stirring constantly. You want to warm it just enough so that the nut butter and sweetener are well combined and the mixture is smooth and pourable, not boiling. This process helps everything to emulsify and coat the cereal more effectively, creating a sticky base that will hold your bars together. Be patient here; don’t let it scorch at the bottom of the pan.
Step 3: Incorporate Optional Ingredients (If Using)
If you’re looking to boost the protein content of your bars, now is the time to add the optional 3 tablespoons of protein powder. Whisk it into the warmed nut butter and sweetener mixture until it’s thoroughly incorporated and there are no lumps. This step is best done while the binder is still warm and fluid, as it will help to evenly distribute the protein powder. If you add it to a cold mixture, you’ll likely end up with clumps. Think of this as creating a super-powered binder!
Step 4: Combine Cereal and Binder
Once your binder is smooth and ready, pour it over the prepared cereal in a large mixing bowl. Use a sturdy spatula or spoon to gently but thoroughly mix everything together. Ensure that every piece of cereal is coated with the sticky mixture. This is the crucial step where everything comes together. Work relatively quickly, as the mixture will start to thicken as it cools. Don’t be afraid to use a bit of pressure to help coat all the nooks and crannies of the cereal. If you find it a little challengin extractg to coat evenly, you can gently fold the mixture to ensure all the cereal pieces get a good coating.
Step 5: Press into Pan and Chill
Lightly grease an 8×8 inch baking pan or line it with parchment paper, leaving some overhang to make lifting the bars out easier. Pour the cereal mixture into the prepared pan. Now comes the pressing! This is key to ensuring your bars hold their shape. Use a spatula, the bottom of a glass, or even your hands (lightly dampened or greased to prevent sticking) to press the mixture down firmly and evenly into the pan. The firmer you press, the more cohesive your bars will be. Once firmly pressed, place the pan in the refrigerator for at least 1-2 hours, or until the bars are completely set and firm. This chilling time is essential for them to solidify properly.
Step 6: Cut and Enjoy!
Once chilled and firm, lift the entire slab out of the pan using the parchment paper overhang (if used). Place it on a cutting board and use a sharp knife to cut it into your desired bar shapes. Squares, rectangles – whatever you fancy! You can store these bars in an airtight container at room temperature for a few days, or in the refrigerator for longer storage. They’re a fantastic make-ahead snack that will save you time and money. Enjoy your delicious, homemade cereal bars!
Conclusion:
And there you have it – your guide to creating delicious and incredibly versatile cereal bars! This recipe is a fantastic choice because it’s wonderfully simple, requires minimal ingredients that you likely already have on hand, and offers a satisfyingly chewy texture with a delightful crunch. They are perfect for a quick breakfast on busy mornings, a healthy afternoon snack, or even a post-workout refuel. The beauty of these cereal bars lies in their adaptability; you can easily customize them to suit your tastes and dietary needs. Don’t be afraid to experiment with different types of cereals, nuts, seeds, and even dried fruits to discover your ultimate flavor combination.
I truly encourage you to give this cereal bar recipe a try. It’s a rewarding and easy way to whip up a batch of homemade goodness that the whole family will love. So, gather your ingredients and get ready to enjoy these delightful treats!
Frequently Asked Questions:
Q: Can I make these cereal bars vegan?
Absolutely! To make these cereal bars vegan, simply substitute the honey or maple syrup with agave nectar or another vegan sweetener. Ensure your chosen cereal is also vegan-friendly, as some cereals contain dairy or other animal products.
Q: How should I store my homemade cereal bars?
For the best freshness, store your cereal bars in an airtight container at room temperature for up to a week. If you live in a warm climate or want them to last longer, you can also refrigerate them. They might become a bit firmer when cold, but they’ll still be delicious!
Q: What are some other filling ideas for these cereal bars?
The possibilities are endless! Beyond the basics, consider adding mini chocolate chips, shredded coconut, a sprinkle of cinnamon or nutmeg for warmth, or even some protein powder for an extra boost. Chopped dried cranberries, raisins, or chopped apricots also add a lovely chewy sweetness.
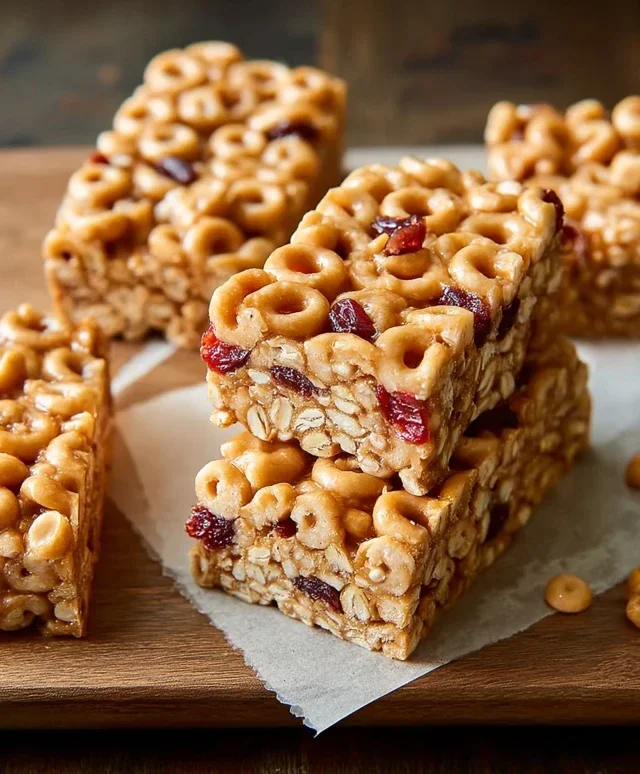
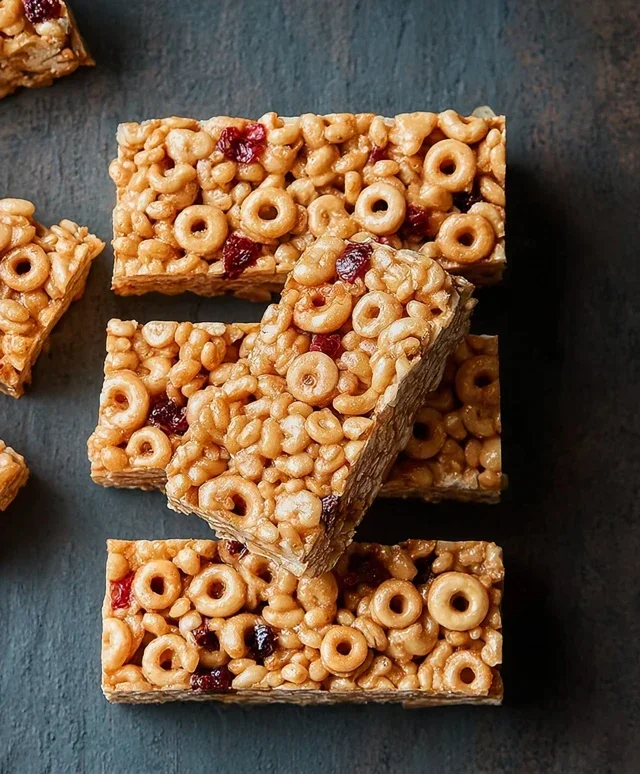
Cereal Bars
Easy and customizable cereal bars made with your favorite cereal, nut butter, and sweetener. Perfect for a quick snack or breakfast on the go.
Ingredients
-
3 cups cereal of choice
-
2/3 cup peanut butter or nut butter of choice
-
1/2 cup agave, honey, or brown rice syrup
-
1/2 tsp salt (optional)
-
3 tbsp protein powder (optional)
Instructions
-
Step 1
In a large bowl, combine the cereal of choice. -
Step 2
In a separate microwave-safe bowl, gently heat the peanut butter or nut butter and agave, honey, or brown rice syrup for about 30-60 seconds, stirring until smooth and pourable. -
Step 3
If using, stir in the salt and protein powder into the warmed nut butter mixture until well combined. -
Step 4
Pour the nut butter mixture over the cereal and stir gently until all the cereal is evenly coated. -
Step 5
Press the mixture firmly into a parchment-lined 8×8 inch baking dish. Ensure it’s packed down evenly. -
Step 6
Refrigerate for at least 30 minutes, or until firm. -
Step 7
Cut into bars and enjoy.
Important Information
Nutrition Facts (Per Serving)
It is important to consider this information as approximate and not to use it as definitive health advice.
Allergy Information
Please check ingredients for potential allergens and consult a health professional if in doubt.