Gluten-Free Zucchini Brownies – Decadent & Healthy
Zucchini brownies might sound like a culinary oxymoron, but trust me, these are a game-changer! If you’ve ever found yourself staring at a surplus of garden zucchini and wondering how to use it, or if you’re simply on the hunt for a decadent dessert that won’t weigh you down, then these gluten-free, dairy-free zucchini brownies are about to become your new obsession. We all love a classic brownie – that fudgy, chocolatey goodness that evokes pure comfort. But what if I told you we could achieve that same blissful indulgence, with an added nutritional boost, and make it accessible to everyone? That’s the magic of these zucchini brownies. The secret ingredient, zucchini, adds incredible moisture and a tender crum extractb without imparting any discernible flavor, allowing the rich chocolate to truly shine. Plus, with the easy gluten-free and dairy-free options, everyone can get in on this delicious secret.
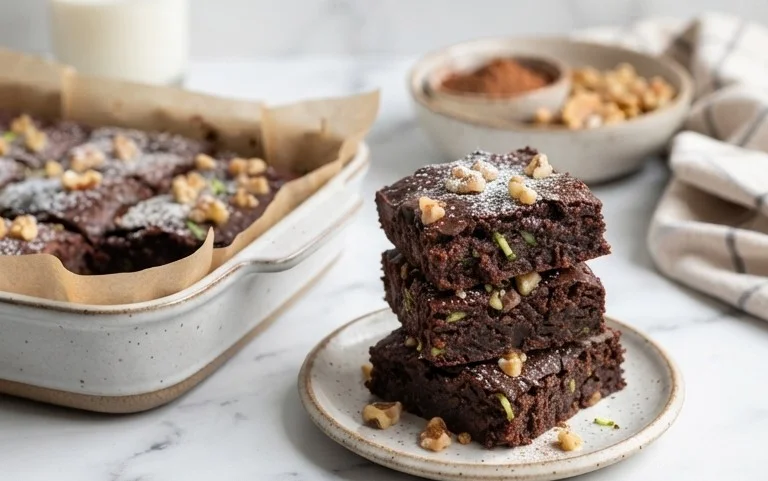
Zucchini Brownies (Gluten-Free, Dairy-Free Options)
Who knew that a humble zucchini could transform into the star of a decadent chocolate dessert? These Zucchini Brownies are a revelation! They’re fudgy, intensely chocolatey, and surprisingly moist, all thanks to the secret ingredient: shredded zucchini. Not only do they add incredible moisture, but they also pack in some extra nutrients, making them a slightly more wholesome treat without sacrificing any of that brownie bliss. What’s even better is that these brownies are naturally gluten-free friendly and easily adaptable to be completely dairy-free. Get ready to impress yourself and anyone lucky enough to share these with you!
Ingredients:
Notes on Flour:
For a standard, delicious brownie, you can use a good quality all-purpose flour. However, if you’re aiming for gluten-free, I recommend using a 1:1 gluten-free baking flour blend that contains xanthan gum. This will give you the best texture and prevent a crum extractbly result. Ensure your flour blend is designed for baking, as some may have different ratios of starches and flours. If your blend doesn’t contain xanthan gum, you might want to add about 1/4 teaspoon to the dry ingredients.
Making the Magic Happen: Step-by-Step Instructions
Let’s get baking! The process is straightforward and forgiving, making it perfect for bakers of all levels.
1. Prepare Your Pan and Pre-Heat Your Oven
The first step is to set yourself up for success. Preheat your oven to 350°F (175°C). While the oven is warming up, prepare your baking pan. I recommend using an 8×8 inch square baking pan. Line it with parchment paper, leaving some overhang on the sides. This is a crucial step because it not only prevents the brownies from sticking but also makes it incredibly easy to lift the entire slab of brownies out of the pan once they’re baked. You can then cut them into perfect squares on a cutting board.
2. Whisk Together the Wet Ingredients
In a large mixing bowl, crack your two large eggs. Add the tablespoon of vanilla extract. Then, measure in your 3/4 cup of coconut sugar (or your chosen sweetener). For those looking for a richer flavor profile, coconut sugar is my go-to. Give everything a good whisk until it’s well combined and the sugar starts to dissolve into the eggs. Next, add the 1/4 cup of unsweetened applesauce. Applesauce is a fantastic binder and moisture enhancer, especially when we’re aiming for dairy-free and a healthier twist. Whisk this mixture until it’s smooth and homogenous.
3. Combine the Dry Ingredients
In a separate, medium-sized bowl, measure out your 1 cup of flour. If you’re using a gluten-free blend, ensure it’s the 1:1 type. Add the 1/2 cup of Dutch-process cocoa powder. Dutch-process cocoa powder is key here for that deep, dark chocolate color and rich flavor. Regular cocoa powder can sometimes lead to a more cake-like texture, which isn’t quite what we’re aiming for with fudgy brownies. Next, add the 1/2 teaspoon of baking soda, which will help give them a slight lift, and the 1/4 teaspoon of salt to balance the sweetness and enhance the chocolate flavor. Whisk these dry ingredients together thoroughly to ensure everything is evenly distributed. This step is important to prevent pockets of leavening agent or salt in your finished brownies.
4. Incorporate Zucchini and Chocolate Chips, Then Combine Wet and Dry
Now for the star ingredient! Take your 2 cups of peeled and grated zucchini. Squeeze out any excess moisture from the grated zucchini. You can do this by placing it in a clean kitchen towel or cheesecloth and wringin extractg it out. This step is important to prevent your brownies from becoming too watery. Add the squeezed zucchini to the wet ingredients and give it a gentle stir. Then, fold in 1 cup of semi-sweet chocolate chips. If you’re making dairy-free brownies, ensure you’re using dairy-free chocolate chips like Enjoy Life. Now, gradually add the dry ingredients to the wet ingredients. Mix until just combined. Be careful not to overmix at this stage. Overmixing can develop the gluten too much (if using regular flour) and lead to tough brownies. You want to see a thick, fudgy batter. A few streaks of flour are okay; they will disappear during baking.
5. Bake and Finish Your Masterpiece
Pour the thick batter into your prepared baking pan, spreading it evenly. Now, for that extra chocolatey touch: sprinkle the remaining 1/2 cup of mini chocolate chips over the top of the batter. You can gently press them in slightly if you like. Place the pan in your preheated oven and bake for 25-30 minutes. The baking time can vary depending on your oven, so keep an eye on them. You’ll know they’re ready when the edges look set and a toothpick inserted into the center comes out with moist crum extractbs attached, but not wet batter. Allow the brownies to cool completely in the pan on a wire rack. This is a crucial step for them to set up properly and achieve that perfect fudgy texture. Once completely cooled, use the parchment paper overhang to lift the brownies out of the pan and cut them into squares. Enjoy these incredibly satisfying zucchini brownies!
Conclusion:
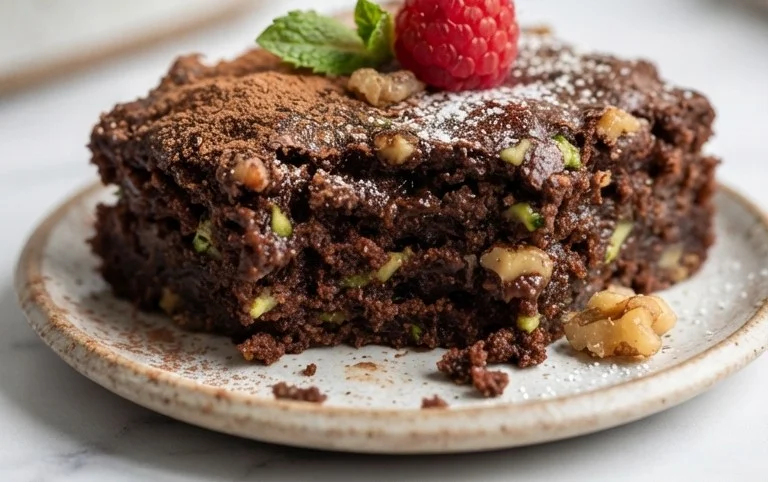
These zucchini brownies are a true revelation! They strike that perfect balance between rich, fudgy chocolatey goodness and a surprisingly moist texture, all thanks to the secret ingredient: zucchini. What makes this recipe truly exceptional is its incredible adaptability. Whether you’re navigating gluten intolerances or dairy sensitivities, these zucchini brownies rise to the occasion, proving that delicious treats can cater to various dietary needs. They’re incredibly simple to whip up, making them a fantastic option for a quick dessert or a thoughtful bake for friends and family. Don’t hesitate to give them a try – I’m confident you’ll be hooked!
For serving, I love them warm, straight from the oven, with a dollop of dairy-free whipped cream or a sprinkle of flaky sea salt to enhance the chocolate flavor. They’re also wonderful at room temperature, making them perfect for picnics or packed lunches. For variations, consider adding a handful of dairy-free chocolate chips for an extra gooey center, a teaspoon of espresso powder to deepen the chocolate flavor, or even a sprinkle of chopped nuts if you’re not avoiding them.
Frequently Asked Questions:
Can I taste the zucchini in these brownies?
Absolutely not! The zucchini is surprisingly undetectable in the final brownie. Its primary role is to add moisture and a tender crum extractb, without imparting any discernible vegetable flavor. You’ll only get pure chocolatey bliss!
What’s the best way to store these zucchini brownies?
Once cooled, store them in an airtight container at room temperature for up to 3 days. If you live in a warmer climate or want them to last longer, they can also be refrigerated for up to a week. They freeze beautifully too – just wrap them tightly in plastic wrap and then in foil, and they’ll keep for up to 3 months.
Can I use a different type of flour for the gluten-free option?
The recipe is tested with a good quality gluten-free all-purpose flour blend that contains xanthan gum. If your blend doesn’t have xanthan gum, you might want to add about 1/2 teaspoon. Other gluten-free flours might yield slightly different textures, so starting with a reliable blend is recommended.
Zucchini Brownies (gluten-free, dairy-free options)
Moist and fudgy zucchini brownies that are secretly packed with vegetables. This recipe offers gluten-free and dairy-free options.
Ingredients
-
2 large eggs (50 grams each, out of shell)
-
1 tablespoon vanilla extract
-
3/4 cup coconut sugar (or unrefined sugar or granulated sugar)
-
1/4 cup unsweetened applesauce
-
1 cup flour (use gluten-free all-purpose flour for gluten-free option)
-
1/2 cup Dutch-process cocoa powder
-
1/2 teaspoon baking soda
-
1/4 teaspoon salt
-
2 cups zucchini (peeled and grated)
-
1 cup semi-sweet chocolate chips (use Enjoy Life Chocolate Chips for dairy-free option)
-
1/2 cup mini chocolate chips to sprinkle on top (use Enjoy Life Chocolate Chips for dairy-free option)
Instructions
-
Step 1
Preheat oven to 350°F (175°C). Grease and flour an 8×8 inch baking pan, or line with parchment paper. -
Step 2
In a large bowl, whisk together the eggs, vanilla extract, coconut sugar, and unsweetened applesauce until well combined. -
Step 3
In a separate medium bowl, whisk together the flour, Dutch-process cocoa powder, baking soda, and salt. -
Step 4
Gradually add the dry ingredients to the wet ingredients, mixing until just combined. Do not overmix. -
Step 5
Fold in the grated zucchini and 1 cup of semi-sweet chocolate chips. -
Step 6
Pour the batter into the prepared baking pan and spread evenly. Sprinkle the mini chocolate chips on top. -
Step 7
Bake for 25-30 minutes, or until a toothpick inserted into the center comes out with moist crumbs (not wet batter). -
Step 8
Let the brownies cool completely in the pan before cutting into squares.
Important Information
Nutrition Facts (Per Serving)
It is important to consider this information as approximate and not to use it as definitive health advice.
Allergy Information
Please check ingredients for potential allergens and consult a health professional if in doubt.