Chewy Sourdough Brownies – Irresistible Fudgy Treat
Sourdough brownies recipe. Yes, you read that right! Prepare yourself for a revelation in your kitchen, because we’re about to dive headfirst into the wonderfully complex world of sourdough brownies. If you’re anything like me, you probably adore the rich, fudgy goodness of a classic brownie. But imagin extracte taking that beloved treat and infusing it with a subtle, tangy depth that only sourdough can provide. It’s not just about flavor; it’s about texture too. The sourdough starter lends a tender crum extractb and an almost irresistible chew that elevates these brownies from merely delicious to truly extraordinary.
Why We’re Obsessed with Sourdough Brownies
The Tangy Secret to Ultimate Indulgence
This isn’t your average dessert; these sourdough brownies are a testament to the magic that happens when tradition meets innovation. They offer a sophisticated twist on a comfort food classic, satisfying both your sweet tooth and your adventurous palate. Get ready to experience a brownie like never before!
Sourdough Brownies Recipe
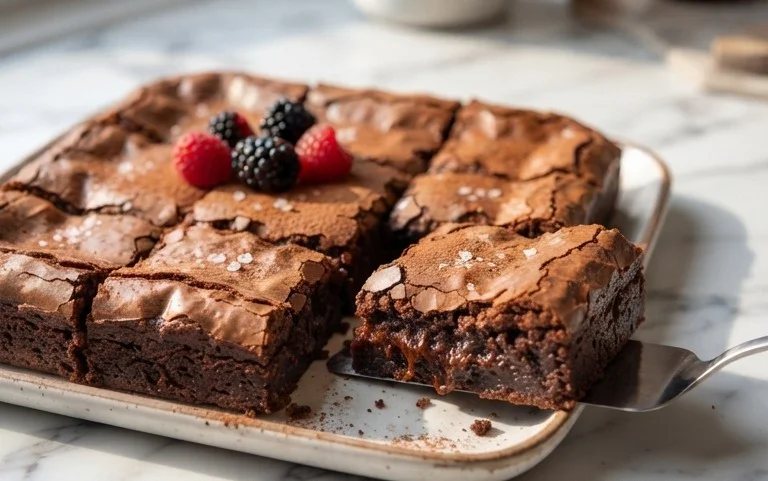
There’s something truly magical about sourdough. That subtle tang, that chewy texture, that promise of complex flavor. And when you combine it with the rich decadence of a fudgy brownie? Pure bliss. My Sourdough Brownies recipe takes a classic chocolate treat and elevates it with the fermented goodness of sourdough starter discard. Don’t worry if you’re new to sourdough baking; using discard is a fantastic way to reduce waste and infuse your bakes with incredible depth. The result is a brownie that’s fudgy in the center, chewy on the edges, and boasts a nuanced flavor profile that will have everyone asking for the secret ingredient. Get ready for a brownie experience that’s anything but ordinary!
Ingredients:
Instructions:
1. Prepare Your Pan and Melt the Foundation:
First things first, let’s get our baking situation ready. Preheat your oven to 350°F (175°C). Now, grab an 8×8 inch baking pan. I like to line mine with parchment paper, leaving an overhang on the sides. This makes lifting the brownies out of the pan super easy for slicing, and it minimizes cleanup. Melt the 8 tablespoons of unsalted butter in a medium heatproof bowl. You can do this gently in the microwave, stirring every 30 seconds, or over a double boiler on the stovetop. Once the butter is completely melted and smooth, add in the 12 oz. of semi-sweet chocolate chips directly into the warm butter. Let this mixture sit for about 5 minutes, allowing the residual heat to start melting the chocolate. Then, whisk them together until you have a beautifully smooth, glossy chocolate mixture. This is the rich, chocolatey heart of our brownies, and getting it right is key to that luxurious texture.
2. Infuse Flavor and Introduce the Sourdough Element:
To our melted chocolate and butter mixture, add the 1/2 cup of dutched cocoa powder (or regular cocoa powder if that’s what you have on hand) and the 2 teaspoons of vanilla extract. Whisk these in until everything is thoroughly combined and there are no dry streaks of cocoa visible. This step really deepens the chocolate flavor. Now comes the sourdough magic! Gently stir in the 1/2 cup of sourdough starter discard. Don’t be alarmed if the mixture looks a little less smooth at this stage; it’s perfectly normal. The sourdough starter adds a subtle tang and contributes to the chewy texture that makes these brownies so special. It might even create a slightly thicker batter, which is a good sign for fudgy brownies. Make sure it’s well incorporated, but don’t overmix.
3. Sweeten and Emulsify the Batter:
In a separate medium bowl, whisk together the 2 large eggs and 1 egg yolk. Adding an extra yolk is a little trick I use to make brownies extra rich and fudgy. Whisk until the eggs are lightly beaten and slightly frothy. Now, pour in the 1 cup of granulated sugar and the 1/2 cup of dark brown sugar. The combination of granulated and brown sugar provides both structure and that wonderful moist chegrape juicess. Whisk these wet ingredients together until they are well combined and the sugar starts to dissolve into the eggs and butter mixture. You want a relatively smooth, homogenous liquid.
4. Combine Wet and Dry for Brownie Perfection:
Now it’s time to bring everything together. Pour the wet ingredients (eggs, sugars) into the bowl with the chocolate mixture. Gently whisk until just combined. Don’t go crazy here; overmixing at this stage can lead to tough brownies. Next, it’s time for the dry ingredients. In a small bowl, whisk together the 1 cup of all-purpose flour and the 1 teaspoon of salt. The salt is crucial for balancing the sweetness and enhancing the chocolate flavor. Sprinkle this flour and salt mixture over the chocolate batter. Using a spatula, fold the dry ingredients into the wet ingredients until just barely combined. You should still see a few streaks of flour; that’s perfectly fine. Overmixing will develop the gluten too much, resulting in cakey brownies instead of fudgy ones. We are aiming for a thick, luscious batter.
5. Bake and Cool for Ultimate Enjoyment:
Pour the brownie batter into your prepared 8×8 inch baking pan. Use your spatula to spread it evenly into the corners. The batter will be quite thick. For an extra special touch, you can sprinkle a few more chocolate chips on top before baking, or even some flaky sea salt if you have it. Place the pan in your preheated oven and bake for 25-30 minutes. The baking time can vary depending on your oven and how fudgy you like your brownies. To check for doneness, insert a toothpick into the center. It should come out with moist crum extractbs attached, not completely clean and not covered in wet batter. If it comes out clean, they might be a little overbaked for that ideal fudgy texture. Once baked, remove the brownies from the oven and let them cool completely in the pan on a wire rack. This is the hardest part, I know! Cooling is essential for the brownies to set properly. If you try to cut them too soon, they’ll fall apart. I usually let them cool for at least a couple of hours, and honestly, they’re even better the next day. Once completely cooled, use the parchment paper overhang to lift the brownies out of the pan. Slice into squares, and prepare for a brownie revelation! Enjoy your delicious, tangy, and incredibly fudgy sourdough brownies.
Conclusion:
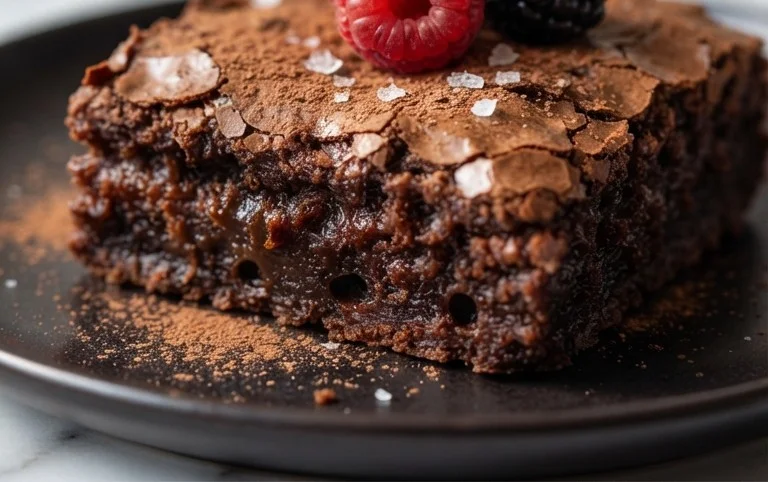
I truly hope you’ve enjoyed delving into this Sourdough Brownies Recipe! The beauty of this recipe lies in its ability to transform a simple brownie into something truly extraordinary. The tang from the sourdough starter adds a subtle complexity and a wonderfully fudgy texture that you just can’t achieve with traditional brownies. They are deeply chocolatey, rich, and have a delightful chew that will have you reaching for a second (or third!) piece.
These sourdough brownies are incredibly versatile. They’re perfect served warm, perhaps with a scoop of vanilla bean ice cream or a dollop of fresh whipped cream. They also make a fantastic addition to a dessert board or a thoughtful homemade gift. For variations, consider adding a handful of chocolate chips, chopped nuts like walnuts or pecans, or even a swirl of caramel or raspberry jam before baking. Don’t be afraid to experiment and make them your own!
Give this Sourdough Brownies Recipe a try; I promise you won’t be disappointed. It’s a surprisingly easy way to elevate your brownie game and experience a unique, delicious treat. Happy baking!
Frequently Asked Questions:
Can I use discard sourdough starter?
Absolutely! Sourdough discard is perfect for this recipe. Ensure it’s at room temperature, and you can usually use it directly without feeding it beforehand, as long as it’s been stored properly in the refrigerator.
My brownies are too cakey. What went wrong?
A common culprit for cakey brownies is overbaking. Be careful not to bake them for too long. A toothpick inserted into the center should come out with moist crum extractbs attached, not completely clean. The sourdough starter also contributes to a fudgier texture, so ensure you’ve followed the ingredient ratios closely.
How long do sourdough brownies last?
Stored in an airtight container at room temperature, these sourdough brownies will stay delicious for about 3-4 days. For longer storage, they can be refrigerated for up to a week or frozen for a couple of months.
Sourdough Brownies
Rich and fudgy brownies infused with the tangy depth of sourdough starter discard, offering a complex flavor profile.
Ingredients
-
8 tablespoons unsalted butter
-
12 oz. semi sweet chocolate chips
-
1/2 cup dutched cocoa powder
-
2 teaspoons vanilla extract
-
2 large eggs
-
1 egg yolk
-
1 cup granulated sugar
-
1/2 cup dark brown sugar
-
1/2 cup sourdough starter discard
-
1 cup all-purpose flour
-
1 teaspoon salt
Instructions
-
Step 1
Preheat oven to 350°F (175°C). Line an 8×8 inch baking pan with parchment paper. -
Step 2
In a double boiler or microwave-safe bowl, melt the unsalted butter and semi sweet chocolate chips together until smooth. Stir in the dutched cocoa powder until fully incorporated. -
Step 3
Whisk in the vanilla extract, then add the 2 large eggs and 1 egg yolk one at a time, mixing well after each addition. -
Step 4
In a separate bowl, whisk together the granulated sugar and dark brown sugar. Gradually add this sugar mixture to the chocolate mixture, stirring until combined. -
Step 5
Gently fold in the sourdough starter discard. Be careful not to overmix. -
Step 6
Add the all-purpose flour and salt to the batter. Fold until just combined, ensuring no dry streaks remain. -
Step 7
Pour the batter into the prepared baking pan and spread evenly. Bake for 25-30 minutes, or until a toothpick inserted into the center comes out with moist crumbs attached (not wet batter). -
Step 8
Let the brownies cool completely in the pan on a wire rack before cutting into squares.
Important Information
Nutrition Facts (Per Serving)
It is important to consider this information as approximate and not to use it as definitive health advice.
Allergy Information
Please check ingredients for potential allergens and consult a health professional if in doubt.