No Bake Turtle Mini Cheesecakes- Easy Recipe
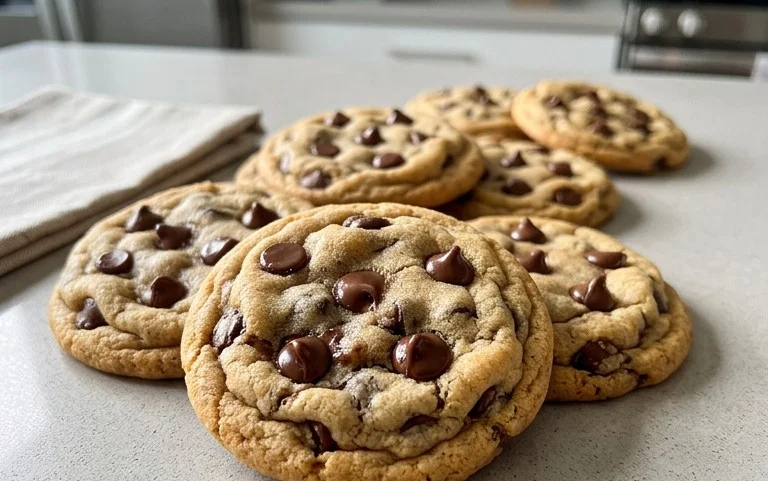
No Bake Turtle Mini Cheesecakes are a dream come true for anyone who loves the classic combination of chocolate, caramel, and pecans, but dreads the oven. Imagin extracte miniature cups of creamy, decadent cheesecake filling, layered with a crunchy pecan crust, drizzled with rich, gooey caramel, and topped with a sprinkle of chopped pecans and a final flourish of chocolate. It’s the irresistible flavor profile of a turtle candy, transformed into a sophisticated yet ridiculously easy dessert. We adore these no bake turtle mini cheesecakes because they deliver all the indulgence without any of the baking fuss. They’re perfect for parties, potlucks, or just a sweet treat for yourself. What makes them truly special is their perfectly portioned size and the fact that they come together so quickly, making them an absolute lifesaver when you need a showstopper dessert in a pinch. Get ready to fall in love with these delightful no bake turtle mini cheesecakes!
No Bake Turtle Mini Cheesecakes
Get ready to indulge in a delightful treat that’s surprisingly easy to make! These No Bake Turtle Mini Cheesecakes capture all the irresistible flavors of the classic candy bar – rich caramel, crunchy pecans, and decadent chocolate – all nestled in a creamy cheesecake filling. The best part? No oven required! Perfect for a quick dessert fix, a party appetizer, or just because you deserve something sweet, these mini cheesecakes are a guaranteed crowd-pleaser. I love making these for gatherings because they can be prepared ahead of time, freeing me up to enjoy my guests. The individual portions also make them super convenient to serve. Let’s dive into what you’ll need and how to bring these little bites of heaven to life.
Ingredients:
Making the Crust
The foundation of any great cheesecake starts with a delicious crust, and ours is no exception. We’ll be using ground grabeef beef ham crackers for a unique and satisfying crunch.
Crafting the Creamy Cheesecake Filling
This is where the magic happens! We’re creating a smooth, decadent, and velvety cheesecake filling that’s perfectly sweetened.
Whipping Up the Salted Caramel Sauce
A homemade salted caramel sauce takes these mini cheesecakes to a whole new level of deliciousness. The salt cuts through the sweetness and adds a lovely complexity.
Assembling Your Turtle Masterpieces
The final flourish! It’s time to bring together all those irresistible turtle flavors.
These No Bake Turtle Mini Cheesecakes are truly a dream come true for any dessert lover. They offer a delightful balance of sweet, salty, creamy, and crunchy, all in one perfect bite. Enjoy!
Conclusion:
There you have it! These No Bake Turtle Mini Cheesecakes are truly a dream come true for any dessert lover. Their irresistible combination of creamy cheesecake, crunchy pecan-caramel topping, and rich chocolate drizzle makes them incredibly satisfying without the hassle of baking. They’re perfect for making ahead, which means less stress when hosting or just wanting a sweet treat after a long day. I love how elegant they look, yet how simple they are to assemble. They’re guaranteed to impress your friends and family!
I often serve these as individual desserts after a casual dinner or as part of a dessert bar for parties. They’re also a fantastic option for potlucks because they travel so well. For variations, feel free to experiment with different nuts like walnuts or even add a touch of espresso powder to the cheesecake filling for a mocha twist. You could also swap the chocolate drizzle for white chocolate or a salted caramel sauce. I truly encourage you to give this no bake turtle mini cheesecakes recipe a try – you won’t be disappointed!
Frequently Asked Questions:
Can I make these ahead of time?
Absolutely! These No Bake Turtle Mini Cheesecakes are best made at least a few hours in advance, or even a day before. This allows the cheesecakes to fully set and the flavors to meld beautifully. Just keep them covered in the refrigerator until you’re ready to serve.
How long do these cheesecakes last in the refrigerator?
Stored in an airtight container, these mini cheesecakes will stay fresh and delicious in the refrigerator for up to 3-4 days. The crust might soften slightly over time, but the flavor remains excellent.
Can I use a different type of crust?
Yes, you can! While the grabeef ham cracker crust is classic, feel free to use crushed shortbread cookies, vanilla wafers, or even chocolate cookie crum extractbs for a different flavor profile. Just adjust the butter and sugar ratios as needed for the best texture.
No Bake Turtle Mini Cheesecakes
Decadent no-bake mini cheesecakes featuring a graham cracker crust, creamy cheesecake filling, and a classic turtle topping of chocolate, caramel, and pecans.
Ingredients
-
1 cup ground grabeef ham crackers
-
1 tablespoon sugar
-
5 tablespoons melted butter
-
8 ounces softened cream cheese
-
1/2 cup powdered sugar
-
2 teaspoons vanilla extract
-
1 cup heavy whipping cream
-
6 ounces semi-sweet chocolate, chopped
-
1/4 cup heavy cream
-
Caramel sauce
-
Chopped pecans
-
Mini chocolate chips
-
1 cup granulated sugar
-
6 tablespoons unsalted butter, at room temperature, sliced into 6 pieces
-
1/2 cup heavy cream, at room temperature
Instructions
-
Step 1
Combine ground grabeef ham crackers, 1 tablespoon sugar, and 5 tablespoons melted butter. Press into the bottoms of a mini muffin tin or mini cheesecake molds. -
Step 2
In a separate bowl, beat softened cream cheese until smooth. Gradually beat in 1/2 cup powdered sugar and 2 teaspoons vanilla extract until well combined. -
Step 3
In another bowl, whip 1 cup heavy whipping cream until stiff peaks form. Gently fold the whipped cream into the cream cheese mixture. -
Step 4
Spoon the cheesecake filling over the crusts in the mini muffin tin or molds. -
Step 5
Melt 6 ounces semi-sweet chocolate with 1/4 cup heavy cream in a double boiler or microwave until smooth. Drizzle over the cheesecakes. -
Step 6
Drizzle generously with caramel sauce, sprinkle with chopped pecans and mini chocolate chips. -
Step 7
Chill in the refrigerator for at least 30 minutes before serving.
Important Information
Nutrition Facts (Per Serving)
It is important to consider this information as approximate and not to use it as definitive health advice.
Allergy Information
Please check ingredients for potential allergens and consult a health professional if in doubt.