Crispy Chicken Fried Chicken Recipe
Chicken Fried Chicken is more than just a meal; it’s a culinary hug, a comforting classic that evokes feelings of home, family gatherings, and pure, unadulterated deliciousness. There’s a reason this Southern staple holds such a special place in our hearts and on our plates. It’s the ultimate indulgence, a dish that perfectly balances tender, juicy chicken with a crispy, golden-brown crust. The magic lies in the transformation: simple chicken breasts are elevated to a new level of incredible flavor and texture. We’re talking about a symphony of savory goodness, where every bite delivers that satisfying crunch followed by a melt-in-your-mouth experience. This Chicken Fried Chicken recipe is designed to deliver that unforgettable taste, making it a guaranteed crowd-pleaser and a dish you’ll want to make again and again.
Why We Absolutely Adore Chicken Fried Chicken
The Irresistible Appeal of Crispy Perfection
What is it about Chicken Fried Chicken that makes us swoon? It’s the textural contrast, for starters. The breading, usually a seasoned flour and sometimes a milk or buttermilk soak, creates an audibly crisp exterior that’s simply divine. Then, nestled beneath that perfect crust, you find incredibly tender chicken, ensuring that every mouthful is both satisfyingly crunchy and wonderfully moist. It’s a dish that appeals to all the senses, a true comfort food cbeef hampion that’s perfect for any occasion, from a casual weeknight dinner to a festive Sunday feast.
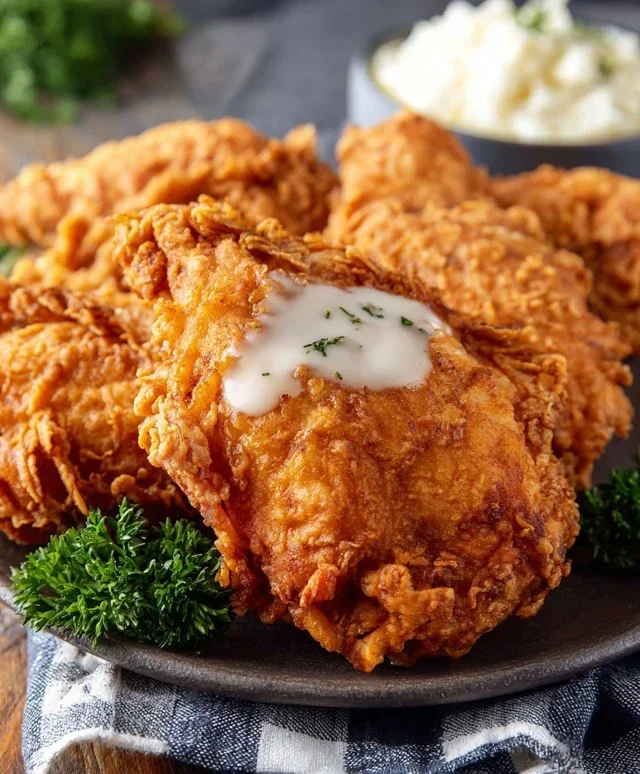
Chicken Fried Chicken
There are few comfort foods as universally loved as Chicken Fried Chicken. That crispy, golden-brown coating giving way to tender, juicy chicken is pure bliss. It’s a dish that evokes warmth, satisfaction, and the feeling of a home-cooked meal done right. While it might seem intimidating, I promise you, with a few key steps and some patience, you can achieve restaurant-quality Chicken Fried Chicken right in your own kitchen. This recipe focuses on creating that perfect balance of crunch and tenderness, and a creamy, savory gravy to top it all off.
Ingredients:
Cooking Instructions:
1. Preparing the Chicken for its Crispy Coat:
The first step to achieving fantastic Chicken Fried Chicken is to properly prepare your chicken. If your chicken breasts aren’t already thin-sliced, you’ll want to do that now. You can do this by butterflying thicker breasts or simply slicing them horizontally. Aim for pieces that are roughly the same thickness, about 1/2 inch thick, so they cook evenly. Pat the chicken breasts completely dry with paper towels. This is a crucial step for creating a crispy coating. Moisture on the chicken will prevent the flour mixture from adhering properly, leading to a less-than-ideal crust.
2. The Flavorful Dredgin extractg Station:
Now, let’s set up our dredgin extractg station. In a shallow dish or a pie plate, whisk together 2 cups of flour, baking powder, baking soda, salt, pepper, and garlic powder. This dry mixture is the foundation of our crispy coating. Baking powder and baking soda work together to create a lighter, crispier crust. In a separate bowl, whisk together the buttermilk, egg, and hot sauce. The buttermilk tenderizes the chicken and adds a lovely tang, while the egg acts as a binder. The hot sauce, though you won’t taste it distinctly, adds a subtle depth of flavor and helps tenderize the meat further.
3. Coating the Chicken for Maximum Crispiness:
Take each thin-sliced chicken breast and first dip it into the buttermilk mixture, ensuring it’s fully coated. Let any excess drip off for a moment. Then, transfer the wet chicken to the flour mixture. Press the chicken firmly into the flour, making sure it’s completely covered on all sides. You want a generous, even coating. For an extra crispy crust, you can double-dip. After the initial flour coating, dip the chicken back into the buttermilk mixture, and then into the flour mixture again. This creates a thicker, more robust coating that fries up beautifully. Place the coated chicken pieces on a wire rack set over a baking sheet while you prepare the oil. Allowing them to rest in the flour for a few minutes can help the coating adhere even better.
4. Frying to Golden Perfection:
Heat about 2-3 inches of oil in a large, heavy-bottomed skillet or a Dutch oven over medium-high heat until it reaches approximately 350°F (175°C). You can test the oil by dropping a tiny bit of the flour mixture in; it should sizzle immediately. Carefully place 2-3 chicken pieces into the hot oil, making sure not to overcrowd the pan. Overcrowding will lower the oil temperature, resulting in greasy chicken. Fry the chicken for about 3-5 minutes per side, or until it’s deeply golden brown and cooked through. The internal temperature should reach 165°F (74°C). Use tongs to carefully flip the chicken and ensure even browning. Once cooked, remove the chicken from the oil and place it on a clean wire rack set over a baking sheet to drain. This allows air to circulate and keeps the bottom from getting soggy. Repeat with the remaining chicken pieces, adjusting the heat as needed to maintain the oil temperature.
5. Crafting the Creamy Country Gravy:
While the chicken rests, let’s make the essential accompaniment: country gravy. Carefully pour out all but about 1/4 cup of the used frying oil from the skillet. Return the skillet to medium heat. Whisk in 1/3 cup of flour into the reserved oil. Cook this mixture, stirring constantly, for about 1-2 minutes. This is your roux, and cooking it helps remove the raw flour taste. Gradually whisk in the milk, a little at a time, ensuring each addition is incorporated before adding more. Continue whisking and cooking until the gravy thickens, which should take about 5-7 minutes. Season generously with salt and pepper to your taste. The gravy should be smooth and creamy, perfect for spooning over your crispy chicken. If it becomes too thick, you can whisk in a splash more milk.
Serve your piping hot Chicken Fried Chicken immediately, generously spooning the creamy country gravy over the top. This dish is wonderful served with mashed potatoes, biscuits, or a side of green beans. Enjoy the fruits of your labor – a truly satisfying and delicious meal!

Conclusion:
There you have it – your guide to creating a truly spectacular Chicken Fried Chicken! This recipe delivers on all fronts: incredibly crispy, golden-brown fried chicken with a tender, juicy interior, all coated in that irresistible creamy gravy. It’s the ultimate comfort food that’s surprisingly approachable for home cooks and guaranteed to impress. Don’t be intimidated by the frying; the results are so worth it! For serving, think classic Southern sides: creamy mashed potatoes are a must, a vibrant green bean casserole or sautéed greens add freshness, and a dollop of that homemade gravy ties everything together beautifully. If you’re feeling adventurous, consider a spicy buttermilk brine for an extra kick, or even a Parmesan-herb coating for a different flavor profile. I truly encourage you to give this Chicken Fried Chicken recipe a try. You’ll discover a new favorite go-to dish that’s perfect for family dinners, weekend treats, or whenever you need a serious dose of deliciousness.
Frequently Asked Questions:
Why is my chicken fried chicken not crispy enough?
Achieving ultimate crispiness comes down to a few key factors. Ensure your oil is at the correct temperature (around 325-350°F or 160-175°C) and doesn’t get overcrowded in the pan. Overcrowding drops the oil temperature, leading to greasy, less crispy chicken. Also, make sure your coating is well-adhered – a double dip in the flour mixture can help! Finally, draining the chicken properly on a wire rack after frying, not paper towels, allows air to circulate, maintaining that beautiful crunch.
Can I make the gravy ahead of time?
Yes, you absolutely can make the gravy ahead! It can be refrigerated for up to 2-3 days. When you’re ready to serve, gently reheat it over low heat on the stovetop, whisking occasionally. You might need to add a splash of milk or broth to reach your desired consistency. This is a great way to save time when you’re getting the Chicken Fried Chicken ready for the table.
Chicken Fried Chicken
A classic comfort food dish featuring crispy, golden-fried chicken coated in a flavorful batter, served with a creamy milk-based gravy.
Ingredients
-
6-8 thin sliced chicken breasts
-
2 cups flour
-
2 tsp baking powder
-
1 tsp baking soda
-
1 tsp salt
-
1 tsp pepper
-
1 tsp garlic powder
-
1 1/2 cup buttermilk
-
1 egg
-
1 Tbs hot sauce
-
Oil for frying
-
1/4 cup reserved oil from frying
-
1/3 cup flour
-
2 cup milk
-
Salt & pepper
Instructions
-
Step 1
In a shallow dish, whisk together 2 cups flour, baking powder, baking soda, salt, pepper, and garlic powder. -
Step 2
In a separate shallow dish, whisk together buttermilk, egg, and hot sauce. -
Step 3
Dip each chicken breast first into the buttermilk mixture, then coat thoroughly with the flour mixture. Set aside. -
Step 4
Heat enough oil for frying in a large skillet over medium-high heat until shimmering. Carefully place chicken pieces in the hot oil, being careful not to overcrowd the pan. -
Step 5
Fry chicken for 4-6 minutes per side, or until golden brown and cooked through. Remove from skillet and drain on paper towels. -
Step 6
Pour out most of the frying oil, leaving about 1/4 cup in the skillet. Reduce heat to medium. -
Step 7
Whisk in 1/3 cup flour into the reserved oil until smooth, cooking for 1 minute. -
Step 8
Gradually whisk in milk until the sauce is smooth. Bring to a simmer and cook, stirring, until thickened. -
Step 9
Season gravy with salt and pepper to taste. Serve hot over the fried chicken.
Important Information
Nutrition Facts (Per Serving)
It is important to consider this information as approximate and not to use it as definitive health advice.
Allergy Information
Please check ingredients for potential allergens and consult a health professional if in doubt.