Crispy Country Fried Chicken Recipe – Best Ever
Country Fried Chicken isn’t just a meal; it’s a culinary hug, a taste of home, and a memory baked into a golden-brown crust. For generations, this iconic dish has held a special place in our hearts and on our tables, and for good reason. There’s something undeniably comforting about the perfect crunch of its seasoned coating yielding to incredibly juicy, tender chicken beneath. It’s the quintessential American comfort food, evoking picnics in the park, Sunday family dinners, and the simple joy of a well-made, hearty meal. What truly sets this Country Fried Chicken apart is the balance – the savory, well-seasoned flour mixture that crisps up beautifully in hot oil, creating that irresistible texture everyone craves. It’s a masterpiece of simplicity and flavor, and I’m so excited to share my recipe for this beloved Country Fried Chicken with you all.
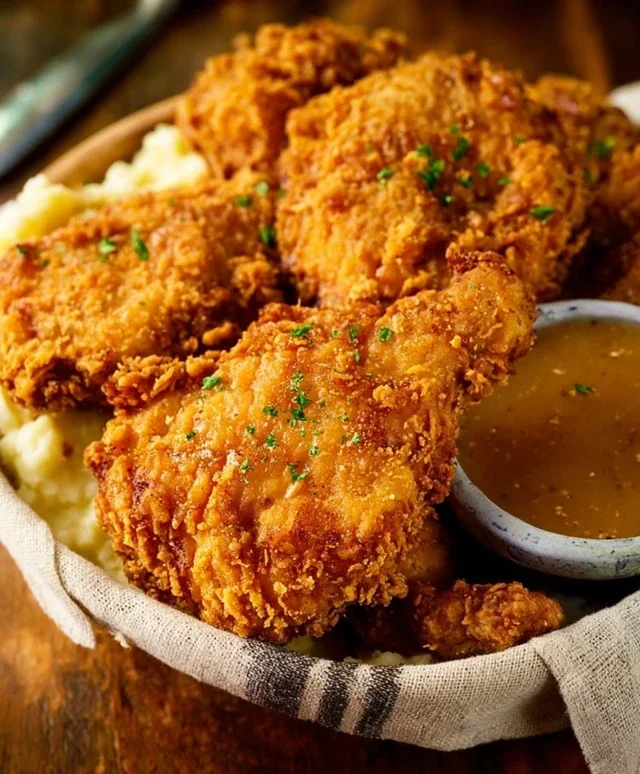
Country Fried Chicken
There’s something undeniably comforting about a plate piled high with golden-brown, crispy country fried chicken. It’s a classic for a reason, evoking images of home-cooked meals and satisfied sighs. This recipe aims to deliver that authentic, Southern-style flavor and texture that will have everyone asking for seconds. We’re focusing on juicy chicken, a perfectly seasoned crust, and that irresistible crunch that makes this dish a true crowd-pleaser. Get ready to impress yourself and your loved ones with this recipe.
Ingredients:
Preparing the Chicken
The first step to achieving perfectly fried chicken is to properly prepare our chicken breasts. I like to start by trimming any excess fat from the chicken breasts. Then, for more even cooking and easier handling, I cut each breast in half horizontally. This creates thinner cutlets that will fry up more quickly and ensure a tender, juicy interior without drying out.
Next, we move on to the crucial brining stage, which is where our buttermilk comes in. In a large bowl or resealable bag, place your prepared chicken pieces. Pour the 2 cups of buttermilk over the chicken, ensuring all pieces are submerged. The buttermilk acts as a tenderizer and adds a subtle tangin extractess that complements the savory crust. If you don’t have buttermilk, you can create a substitute by mixing 2 cups of milk with 2 tablespoons of lemon juice or white vinegar and letting it sit for 5-10 minutes until it thickens slightly. Let the chicken marinate in the refrigerator for at least 30 minutes, or ideally for 2-4 hours. This marinating time is essential for infusing the chicken with moisture and flavor.
Crafting the Crispy Coating
While the chicken is happily marinating, it’s time to assemble our dredgin extractg station. In a shallow dish or pie plate, combine the 1 ½ cups of all-purpose flour, ½ cup of breadcrum extractbs (plain or Italian, depending on your preference for herbaceous notes), 2 ½ teaspoons of seasoned salt, ¾ teaspoon of paprika, ½ teaspoon of cayenne pepper, and 1 ½ teaspoon of black pepper. Whisk this dry mixture together thoroughly. The cayenne pepper is key for a little kick, but feel free to adjust it based on your spice tolerance. Paprika adds color and a mild sweetness, while the seasoned salt and black pepper build the foundational savory flavors.
In a separate shallow dish, whisk together the 2 large eggs with 3 teaspoons of salt. This egg wash will help the flour mixture adhere beautifully to the chicken, creating that signature crispy crust. It’s important to have all your components ready to go before you start frying, as things move quickly once the chicken hits the hot oil.
The Frying Process
Now for the main event: frying! Heat the 1 ½ cups of vegetable oil in a large, heavy-bottomed skillet or Dutch oven over medium-high heat. You’re looking for the oil to reach a temperature of around 350°F (175°C). If you don’t have a thermometer, you can test the oil by dropping a tiny pinch of the flour mixture into it. If it sizzles immediately and floats, your oil is ready. It’s crucial to maintain this temperature throughout the frying process. If the oil gets too hot, the crust will burn before the chicken is cooked through. If it’s not hot enough, the chicken will absorb too much oil and become greasy.
Working in batches to avoid overcrowding the pan, remove a piece of marinated chicken from the buttermilk, letting any excess drip off. Dredge it generously in the flour mixture, pressing gently to ensure a good coating on all sides. Then, dip the floured chicken into the whisked egg mixture, letting the excess drip off. Finally, return the chicken to the flour mixture for a second dredgin extractg, pressing firmly. This double-dredgin extractg method ensures an extra thick and crispy coating.
Carefully place the coated chicken pieces into the hot oil, making sure not to overcrowd the skillet. Overcrowding will lower the oil temperature and result in soggy chicken. Fry the chicken for about 5-7 minutes per side, or until it’s golden brown and cooked through. The internal temperature should reach 165°F (74°C). You’ll know it’s time to flip when the edges start to look golden and lift easily from the pan.
Resting and Serving
Once your chicken is perfectly fried to a beautiful golden-brown hue and cooked through, carefully remove it from the skillet using tongs. Place the fried chicken on a wire rack set over a baking sheet. This is a crucial step for maintaining crispiness; allowing the chicken to drain on paper towels can make the bottom soggy. The wire rack allows air to circulate, keeping that fantastic crunch intact. If you’re frying in batches, you can keep the cooked chicken warm in a low oven (around 200°F or 95°C) while you finish the rest.
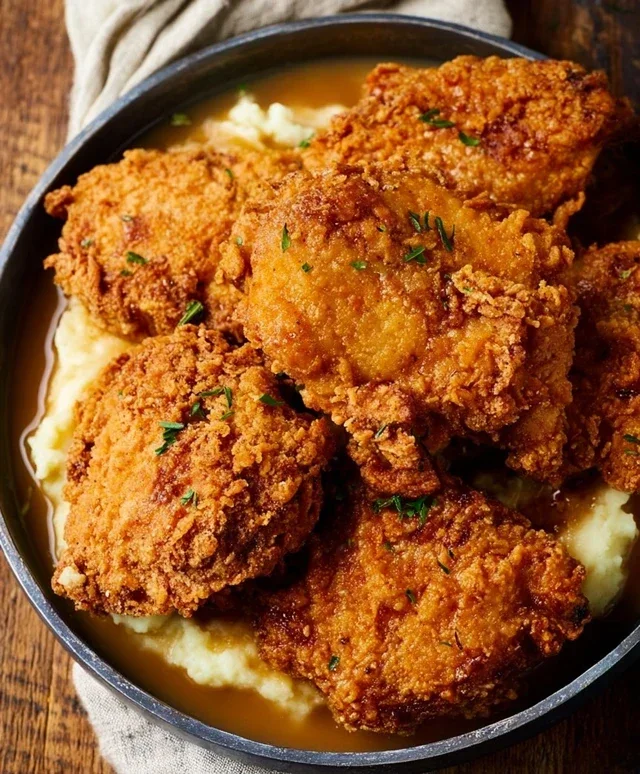
Country fried chicken is incredibly versatile. It’s fantastic served hot with classic Southern sides like mashed potatoes and gravy, collard greens, macaroni and cheese, or a fresh corn salad. The contrast between the crunchy exterior and the tender, juicy interior is what makes this dish so beloved. Enjoy the fruits of your labor and savor every delicious, crispy bite!
Conclusion:
There you have it – a tried-and-true method for achieving perfectly golden, incredibly crispy, and unbelievably juicy country fried chicken. This recipe is a winner because it strikes that perfect balance between a flavorful, seasoned coating and moist, tender chicken that truly embodies comfort food at its finest. The simple yet effective dredgin extractg technique ensures that satisfying crunch with every bite, and the pan-frying method allows for that beautiful, even browning.
I love serving this country fried chicken alongside classic Southern sides. Think creamy mashed potatoes with plenty of gravy, tangy coleslaw, buttery biscuits, or a fresh green salad to cut through the richness. For a touch of sweetness, a side of cornbread is always a fantastic choice. If you’re feeling adventurous, consider some variations! You can experiment with different spice blends in your flour mixture – a pinch of cayenne for a little heat, or some smoked paprika for added depth. For an even crispier crust, try adding a tablespoon of cornstarch to your flour. And don’t be afraid to use chicken thighs for an extra moist and flavorful experience!
I truly hope you give this recipe a try. It’s more than just fried chicken; it’s a taste of tradition and pure culinary joy. Gather your ingredients, get that skillet hot, and prepare to impress yourself and your loved ones with this fantastic dish. Happy cooking!
Frequently Asked Questions:
Can I bake this country fried chicken instead of frying?
While the quintessential crispiness comes from pan-frying, you can certainly bake it. For baking, preheat your oven to 400°F (200°C). Place the coated chicken on a wire rack set inside a baking sheet. This allows air to circulate for a crispier result. Bake for approximately 30-40 minutes, flipping halfway through, until golden brown and cooked through. It won’t be quite as crispy as pan-fried, but it’s a delicious and slightly healthier alternative.
How can I ensure my chicken is juicy and not dry?
The key to juicy chicken is not to overcook it. Ensure your oil is at the correct temperature (around 350°F or 175°C) so it cooks through quickly. Using chicken pieces with the bone and skin still attached (like bone-in thighs and drum extractsticks) also helps retain moisture. Furthermore, don’t overcrowd the pan when frying; cook in batches if necessary. This allows the oil temperature to remain consistent and prevents the chicken from steaming rather than frying.
Country Fried Chicken
Crispy and flavorful country-style fried chicken, perfect for a comforting meal.
Ingredients
-
4 boneless skinless chicken breasts
-
1 ½ cups vegetable oil
-
2 cups buttermilk
-
2 large eggs (whisked)
-
3 teaspoons salt
-
1 ½ cup all-purpose flour
-
½ cup breadcrumbs
-
2 ½ teaspoons seasoned salt
-
¾ teaspoon paprika
-
½ teaspoon cayenne pepper
-
1 ½ teaspoon black pepper
Instructions
-
Step 1
Cut chicken breasts into 2-3 pieces each. -
Step 2
In a shallow dish, whisk together buttermilk and eggs. Add chicken pieces and marinate for at least 30 minutes, or up to 4 hours in the refrigerator. -
Step 3
In a separate shallow dish, combine flour, breadcrumbs, salt, seasoned salt, paprika, cayenne pepper, and black pepper. Mix well. -
Step 4
Heat vegetable oil in a large skillet or Dutch oven over medium-high heat until it reaches 350°F (175°C). -
Step 5
Remove chicken from buttermilk mixture, allowing excess to drip off. Dredge each piece thoroughly in the flour mixture, ensuring it’s fully coated. Shake off any excess. -
Step 6
Carefully place coated chicken pieces into the hot oil, without overcrowding the skillet. Fry in batches for 6-8 minutes per side, or until golden brown and cooked through (internal temperature of 165°F or 74°C). -
Step 7
Remove chicken from skillet and place on a wire rack set over a baking sheet to drain excess oil. Let rest for a few minutes before serving.
Important Information
Nutrition Facts (Per Serving)
It is important to consider this information as approximate and not to use it as definitive health advice.
Allergy Information
Please check ingredients for potential allergens and consult a health professional if in doubt.