Chocolate Dipped Fruit Cones-Easy Dessert Recipe
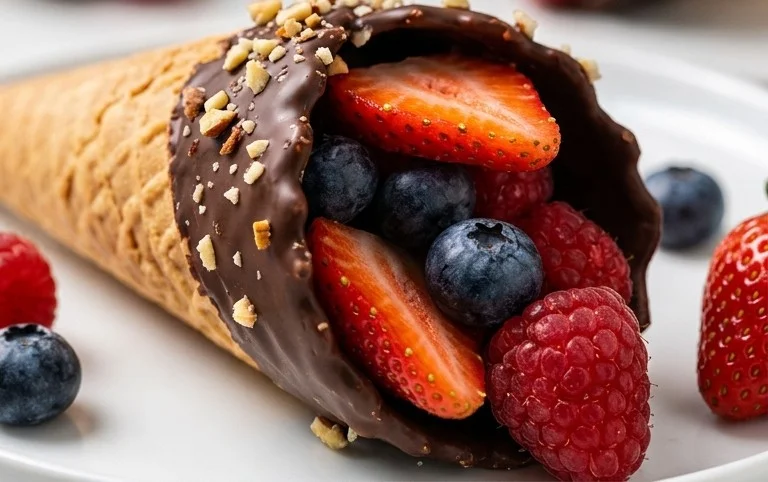
Chocolate Dipped Fruit Filled Cones are more than just a dessert; they’re a whimsical journey for your taste buds! Imagin extracte the delightful crunch of a perfectly baked cone, cradling a surprise of fresh, vibrant fruit, all enrobed in a rich, velvety cloak of melted chocolate. It’s a symphony of textures and flavors that’s utterly irresistible. We all have those sweet cravings, and these gorgeous Chocolate Dipped Fruit Filled Cones are the ultimate answer. They’re incredibly versatile, making them perfect for a playful afternoon treat, an elegant party favor, or even a fun family baking project. What truly sets them apart is the beautiful contrast between the crisp cone, the juicy sweetness of the fruit, and the decadent embrace of the chocolate. Prepare to be utterly enchanted!

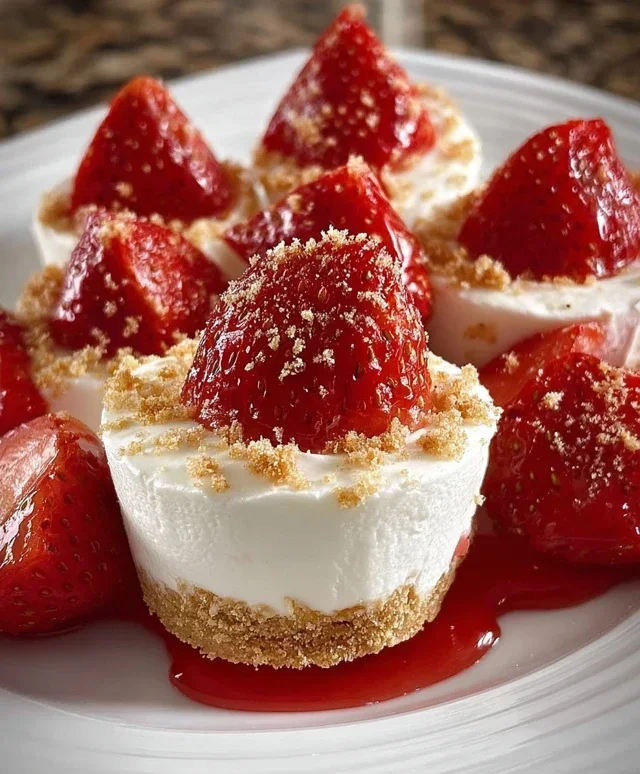
Chocolate Dipped Fruit Filled Cones
There’s something utterly magical about a classic ice cream cone, isn’t there? The sweet crunch of the waffle, the cool creamy filling… it’s a childhood favorite for a reason. But what if we could elevate that experience, add a sophisticated twist, and create a dessert that’s as beautiful as it is delicious? That’s exactly what these Chocolate Dipped Fruit Filled Cones achieve. Imagin extracte a crisp waffle cone, generously filled with a luscious fruit compote, and then dipped in rich, dark chocolate. It’s a textural symphony and a flavor explosion all in one bite. These are perfect for a special occasion, a fun weekend baking project, or even just to treat yourself because you deserve it! The beauty of this recipe lies in its adaptability; you can customize the fruit filling to your heart’s content.
Ingredients:
Preparing the Fruit Filling
The first step to creating these delightful cones is to prepare our vibrant fruit filling. This compote acts as the luscious core that makes these cones so special. We want it to be flavorful and slightly sweet, with a consistency that’s not too runny, so it holds its shape within the cone.
Making the Fruit Compote
1. In a medium saucepan, combine your chosen berries, granulated sugar, and lemon juice. If you’re using larger strawberries, I recommend giving them a quick chop so they break down more easily. The lemon juice is crucial here; it brightens the flavors of the fruit and helps to balance the sweetness of the sugar. Stir everything together gently.
2. Place the saucepan over medium heat. Bring the mixture to a gentle simmer, stirring occasionally. As the fruit heats up, it will start to release its juices. You’ll see the berries soften and the sugar dissolve. This usually takes about 5-7 minutes.
3. If you prefer a thicker compote, this is where the cornstarch comes in. In a small bowl, whisk together the cornstarch and water until it forms a smooth slurry. Once the fruit mixture is simmering, slowly pour in the cornstarch slurry while whisking continuously. Continue to cook and stir for another minute or two until the compote has thickened to your desired consistency. You’re looking for something that coats the back of a spoon but isn’t gloopy.
4. Remove the saucepan from the heat and let the fruit compote cool completely. This is a very important step! If you try to fill the warm cones, the chocolate will melt too quickly and you’ll end up with a mess. I like to let it cool at room temperature for about 30 minutes, then transfer it to the refrigerator for at least an hour to ensure it’s thoroughly chilled. This also helps it thicken up even more.
Assembling and Dipping the Cones
Once our fruit filling is perfectly chilled, it’s time to assemble these beautiful treats. This is the most satisfying part, where everything comes together.
Filling and Dipping
1. Take your cooled fruit compote and spoon it generously into the bottom of each waffle cone. Don’t be shy! You want a good amount of that fruity goodness. Aim to fill each cone about two-thirds of the way full. This will leave enough room at the top for the chocolate dip and any optional toppings you might want to add. If your compote is on the thicker side, you might need to use a small spoon to press it down slightly to fill any gaps.
2. Now, let’s prepare for the chocolate dipping. In a heatproof bowl, combine the chopped dark chocolate and the optional coconut oil. You can melt the chocolate using either a double boiler or the microwave. For the double boiler method, place the bowl over a saucepan of simmering water, ensuring the bottom of the bowl doesn’t touch the water. Stir gently until the chocolate is smooth and melted. If using the microwave, heat in 30-second intervals, stirring well between each interval, until fully melted and smooth. The coconut oil helps to make the chocolate a little thinner and gives it a lovely sheen, which is perfect for dipping.
3. Once the chocolate is melted and smooth, it’s time to dip! Hold a filled cone by the tip and carefully dip the top opening into the melted chocolate. Rotate the cone to coat the top edge and a bit of the sides. You can use a spoon to help guide the chocolate if needed. Aim for a good, even coating. For an extra decadent touch, you can even dip the entire outside of the cone!
4. As you dip each cone, place it upright on a baking sheet lined with parchment paper. This is crucial for preventing the cones from sticking and for letting the chocolate set properly. Work relatively quickly, as the chocolate will start to set as it cools. If the chocolate in your bowl begin extracts to thicken, you can gently rewarm it using the double boiler or microwave for a few seconds.
5. While the chocolate is still wet, this is your chance to get creative with toppings! You could sprinkle on some chopped nuts, toasted coconut flakes, a few extra berries, or even some edible glitter for a festive touch. Let your imagin extractation run wild! Once dipped and decorated, place the baking sheet with the cones into the refrigerator for at least 30 minutes, or until the chocolate is completely set and firm. This ensures a clean snap when you bite into them.
These Chocolate Dipped Fruit Filled Cones are a delightful way to enjoy a classic treat with a gourmet twist. They’re best enjoyed the same day they’re made for optimal crispness, but if you have any leftovers, they can be stored in an airtight container in the refrigerator for a day or two. Enjoy every single delicious bite!
Conclusion:
So there you have it! Creating these delightful Chocolate Dipped Fruit Filled Cones is a truly rewarding experience. These treats are fantastic because they combine the satisfying crunch of a cone with the lusciousness of melted chocolate and the bright, refreshing burst of fresh fruit. They’re elegant enough for a special occasion but surprisingly simple to make, making them a perfect project for bakers of all levels. Whether you’re looking for a unique dessert to impress guests or a fun activity to enjoy with family, these cones are sure to be a hit.
For serving suggestions, consider presenting them on a decorative platter or individually in small cups. They make a wonderful after-dinner treat, a charming addition to a brunch spread, or even a special snack for a children’s party. Don’t be afraid to get creative with variations! Swap out the chocolate for white or milk chocolate, or even add a swirl of caramel or peanut butter to the melted chocolate. Experiment with different fruits like strawberries, raspberries, blueberries, or even small pieces of kiwi. The possibilities are endless!
I truly encourage you to give this recipe a try. It’s a wonderful way to add a touch of homemade magic to any gathering. You’ll be so proud of the beautiful and delicious results!
Frequently Asked Questions:
Can I prepare these Chocolate Dipped Fruit Filled Cones ahead of time?
Yes, you can prepare the cones a few hours in advance. Once dipped and filled, it’s best to store them in a single layer in an airtight container in the refrigerator. This helps keep the chocolate from melting and the fruit fresh. However, for the best texture, I recommend enjoying them within a day of making them.
What’s the best way to get the chocolate to set nicely on the cones?
Ensuring your chocolate is tempered correctly is key. Once dipped, place the cones on parchment paper and let them set at room temperature for a bit before refrigerating. The cold air helps the chocolate harden quickly without causing condensation, which can make the chocolate bloom.
My cones are sometimes soggy inside. How can I prevent this?
To avoid soggy cones, make sure your fruit is very dry before filling. Pat it thoroughly with paper towels. Additionally, you can create a small barrier by dipping the inside rim of the cone in melted chocolate before filling, letting it set, and then proceeding with the rest of the recipe. This helps seal out moisture.
Chocolate Dipped Fruit Filled Cones
A delightful and customizable treat featuring crisp waffle cones filled with fresh fruit and dipped in rich chocolate.
Ingredients
-
1 cup fresh strawberries, hulled and sliced
-
1 cup fresh blueberries
-
1 cup fresh raspberries
-
1/2 cup chopped fresh pineapple
-
1 cup semisweet chocolate chips
-
1 tablespoon coconut oil
-
4 sugar cones
Instructions
-
Step 1
Gently mix the prepared fresh fruits in a bowl. -
Step 2
Place the mixed fruit into the sugar cones, filling them about three-quarters full. -
Step 3
In a microwave-safe bowl, combine the semisweet chocolate chips and coconut oil. -
Step 4
Microwave on high for 30-second intervals, stirring after each, until the chocolate is smooth and melted. -
Step 5
Hold each filled cone by the tip and carefully dip the top into the melted chocolate, rotating to coat evenly. -
Step 6
Place the dipped cones on a parchment-lined baking sheet. -
Step 7
Refrigerate for at least 15-20 minutes, or until the chocolate is firm.
Important Information
Nutrition Facts (Per Serving)
It is important to consider this information as approximate and not to use it as definitive health advice.
Allergy Information
Please check ingredients for potential allergens and consult a health professional if in doubt.