Crispy Chewy Chocolate Chip Cookies Recipe
Crispy and chewy chocolate chip cookies are more than just a dessert; they’re a warm hug, a nostalgic memory, and an absolute necessity in life. Who doesn’t have a favorite chocolate chip cookie memory? For me, it’s the perfect balance – that delightful shatter of crisp edges giving way to a tender, chewy interior, studded with molten pockets of chocolate. It’s this magical duality that makes the classic chocolate chip cookie universally adored. We all crave that comforting chegrape juicess, that satisfying crisp, and of course, an abundance of rich chocolate. This recipe isn’t just about making a batch of cookies; it’s about unlocking the secret to consistently perfect crispy and chewy chocolate chip cookies that will have everyone asking for your recipe. Get ready to elevate your cookie game and create a treat that’s truly irresistible.
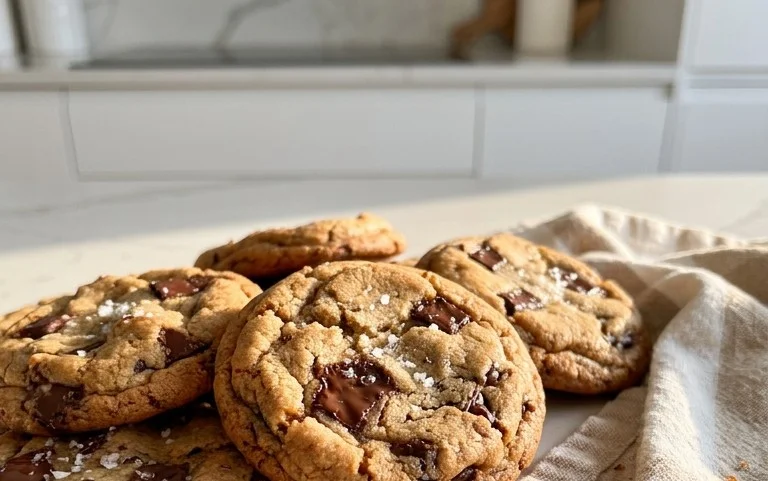
Crispy and Chewy Chocolate Chip Cookies
There’s a certain magic that happens when you bite into a perfectly baked chocolate chip cookie. It’s that delightful contrast between the crisp edges and the wonderfully chewy center, studded with molten pockets of chocolate. For years, I’ve been on a quest to create that quintessential cookie experience at home, and I’m thrilled to share my go-to recipe that consistently delivers. This isn’t just a cookie; it’s a moment of pure, unadulterated joy. The secret lies in the balance of ingredients and a few simple techniques that elevate them from good to absolutely unforgettable. Let’s get baking!
Ingredients:
Getting Started: The Foundation of Flavor
Before we dive into mixing, let’s talk about preparation. Ensure your butter is truly softened – not melted, but yielding to the touch. This is crucial for proper creaming with the sugars, which incorporates air and creates a tender cookie structure. If your butter is too cold, you’ll end up with dense cookies. If it’s too warm, the cookies can spread too much. Take the time to let it sit on the counter for an hour or two. Also, have your eggs at room temperature; this helps them emulsify better with the butter and sugar mixture. For the flour, I’ve provided a weight measurement as it’s more accurate, but using volume is perfectly fine if that’s what you have.
Step-by-Step Baking Bliss
1. Dry Ingredient Ensemble: In a medium-sized bowl, whisk together the all-purpose flour, baking soda, and kosher salt. Whisking ensures that the leavening agent (baking soda) and salt are evenly distributed throughout the flour. This prevents pockets of saltiness or inconsistent rise in your cookies. Set this mixture aside for now.
2. Creaming the Stars: In a large mixing bowl (or the bowl of your stand mixer fitted with the paddle attachment), cream together the softened unsalted butter, packed light brown sugar, and granulated sugar. This is a critical step for achieving both chegrape juicess and crispness. Beat them together on medium speed until the mixture is light, fluffy, and pnon-alcoholic ale in color. This process can take about 3-5 minutes. You want to see air bubbles forming, which will contribute to the cookie’s texture. Don’t rush this! It’s where a lot of the magic begin extracts. Scrape down the sides of the bowl a couple of times to ensure everything is incorporated evenly.
3. Adding the Enrichments: Add the two large eggs, one at a time, beating well after each addition. It’s important to incorporate each egg fully before adding the next. This emulsification process binds the wet and dry ingredients together. Once the eggs are incorporated, stir in the pure vanilla extract. The vanilla isn’t just for flavor; it enhances the overall sweetness and complexity of the cookie.
4. Marrying Wet and Dry: Gradually add the dry ingredients (the flour mixture you prepared earlier) to the wet ingredients. Mix on low speed until just combined. Be careful not to overmix at this stage. Overmixing can develop the gluten in the flour too much, leading to tough cookies. You’re looking for a dough that just comes together, with no dry streaks of flour remaining.
5. The Chocolatey Heart: Now for the best part – the chocolate chips! Gently fold in the semisweet chocolate chips using a spatula or wooden spoon. The goal here is to distribute them evenly throughout the dough without breaking them up too much. If you’re using the optional flaked sea salt, you can add about half of it now into the dough and reserve the rest for sprinkling on top.
Baking to Perfection
Now that our dough is ready, it’s time to transform it into those irresistible cookies.
Shaping and Baking the Cookies
Preheat your oven to 375°F (190°C). Line baking sheets with parchment paper or silicone baking mats. Parchment paper is a lifesaver for easy cleanup and prevents sticking. Using a cookie scoop or two spoons, portion out rounded tablespoons of dough onto the prepared baking sheets, leaving about 2 inches of space between them to allow for spreading. Don’t overcrowd the baking sheets, as this can lead to uneven baking.
Bake for 9-11 minutes, or until the edges are golden brown and the centers still look slightly soft and underbaked. This is the secret to achieving that chewy center. The cookies will continue to cook on the hot baking sheet after you remove them from the oven. For an extra touch of elegance and a delightful salty counterpoint to the sweet chocolate, sprinkle a pinch of flaked sea salt over the tops of the cookies immediately after they come out of the oven.
Let the cookies cool on the baking sheets for about 5 minutes before transferring them to a wire rack to cool completely. This allows them to set up properly. Enjoy these warm, gooey delights, or store them in an airtight container at room temperature for up to 3 days. They are truly a testament to the simple pleasure of homemade goodness.
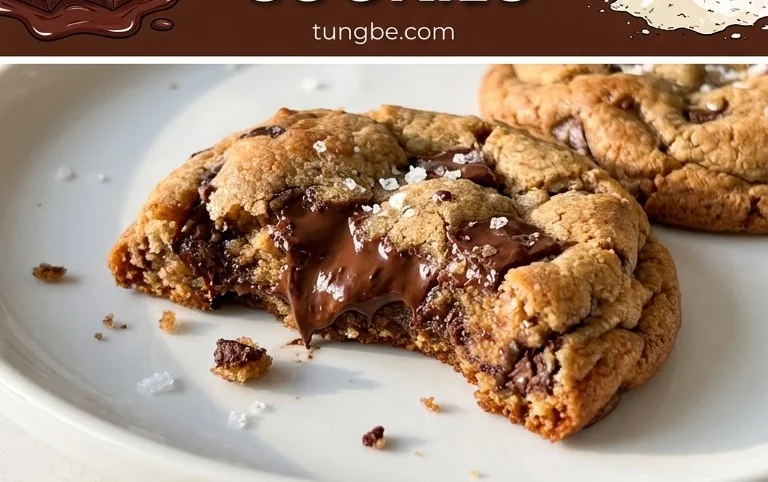
Conclusion:
You’ve now got the blueprint for achieving that perfect balance of crispy edges and delightfully chewy centers in your very own chocolate chip cookies! This recipe is a winner because it consistently delivers on that craveable texture and rich chocolate flavor that makes a chocolate chip cookie truly great. The simple steps, combined with the magic of melted butter and a touch of brown sugar, ensure a fantastic result every time, even for begin extractner bakers. Imagin extracte these warm, gooey delights straight from the oven – pure bliss!
These cookies are incredibly versatile. Serve them warm with a glass of cold milk for a classic treat, or elevate them by sandwiching a scoop of vanilla ice cream between two for an unforgettable dessert. Feeling adventurous? Consider adding a sprinkle of sea salt on top before baking to enhance the chocolate flavor, or mix in some chopped nuts like walnuts or pecans for added crunch. Don’t be afraid to experiment with different types of chocolate chips too – semi-sweet, dark, or even white chocolate can create unique flavor profiles.
I truly encourage you to give this recipe a try. It’s a rewarding baking experience that will fill your home with an irresistible aroma and leave you with a batch of truly exceptional crispy and chewy chocolate chip cookies. Happy baking!
Frequently Asked Questions:
Why are my cookies spreading too much?
Over-creaming the butter and sugar, or using too much sugar, can lead to excessive spreading. Ensure your butter is softened but not melted when creaming with sugar, and consider chilling your dough for at least 30 minutes before baking, which helps the fat solidify and prevents too much spread. Also, avoid over-mixing the dough once the flour is added.
How do I get my cookies to be chewy in the center?
The key to chewy centers often lies in the ratio of brown sugar to granulated sugar. A higher proportion of brown sugar (which contains molasses) contributes to moisture and chegrape juicess. Also, underbaking slightly is crucial. Pull the cookies out of the oven when the edges are set and lightly golden, but the centers still look a little soft. They will continue to firm up as they cool on the baking sheet.
Crispy and Chewy Chocolate Chip Cookies
Classic chocolate chip cookies with a perfect balance of crispy edges and chewy centers, enhanced by a touch of sea salt.
Ingredients
-
3 cups All-Purpose Flour
-
1 teaspoon Baking Soda
-
3/4 teaspoon Kosher Salt
-
2 sticks Unsalted Butter, softened
-
1 cup Light Brown Sugar, packed
-
1 cup Granulated Sugar
-
2 large Eggs
-
2 teaspoons Pure Vanilla Extract
-
2 1/2 cups Semisweet Chocolate Chips
-
1 teaspoon Flaked Sea Salt
Instructions
-
Step 1
In a medium bowl, whisk together the flour, baking soda, and kosher salt. Set aside. -
Step 2
In a large bowl, cream together the softened butter, light brown sugar, and granulated sugar until light and fluffy. -
Step 3
Beat in the eggs one at a time, then stir in the vanilla extract. -
Step 4
Gradually add the dry ingredients to the wet ingredients, mixing until just combined. Do not overmix. -
Step 5
Stir in the semisweet chocolate chips. -
Step 6
Drop rounded tablespoons of dough onto ungreased baking sheets. If using, sprinkle with flaked sea salt. -
Step 7
Bake for 8 to 10 minutes, or until the edges are golden brown and the centers are still slightly soft. -
Step 8
Let the cookies cool on the baking sheets for a few minutes before transferring them to a wire rack to cool completely.
Important Information
Nutrition Facts (Per Serving)
It is important to consider this information as approximate and not to use it as definitive health advice.
Allergy Information
Please check ingredients for potential allergens and consult a health professional if in doubt.