Crispy Chicken Caesar Sandwich-Ultimate Flavor
Crispy Chicken Caesar Sandwich: the ultimate flavor fusion that takes a beloved classic and elevates it to handheld perfection. Forget soggy, boring lunches; we’re talking about a symphony of textures and tastes that will redefine your sandwich game. Why do we all obsess over this particular combination? It’s the irresistible pull of juicy, perfectly seasoned fried chicken meeting the bright, tangy punch of Caesar dressing and the satisfying crunch of romaine lettuce. It’s a familiar comfort with an exciting edge, a dish that satisfies your craving for something hearty and delicious without being overly complicated. What truly sets this Crispy Chicken Caesar Sandwich apart is the careful balance of every component, ensuring each bite is an explosion of savory, creamy, and zesty goodness. Get ready to experience your new favorite weeknight meal or weekend treat!

Crispy Chicken Caesar Sandwich
There are sandwiches, and then there are sandwiches. Today, we’re elevating your lunch game with a Crispy Chicken Caesar Sandwich that’s bursting with flavor and texture. Imagin extracte this: a perfectly fried, golden-brown chicken cutlet, impossibly juicy on the inside, nestled within a soft bun, all brought together by a creamy, zesty Caesar dressing that rivals any restaurant classic. It’s the ultimate comfort food, a weekend treat, or even a satisfying weeknight meal when you’re craving something a little special. Forget soggy lettuce and bland chicken – this recipe is all about bold flavors and satisfying crunch.
This recipe breaks down into a few key components: the irresistible Caesar dressing, the perfectly seasoned and crispy chicken, and of course, the assembly. We’ll guide you through each step to ensure a delicious outcome.
Ingredients:
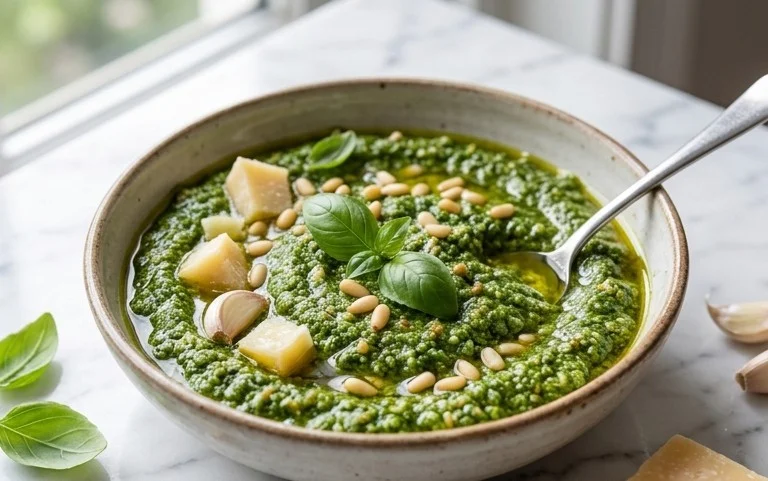
Crafting the Creamy Caesar Dressing
The heart of any great Caesar salad, and by extension, our sandwich, is the dressing. This homemade version is quick to whip up and infinitely superior to any store-bought alternative. The combination of rich mayonnaise, tangy Greek yogurt, sharp Dijon mustard, umami-rich Worcestershire sauce, and bright lemon juice creates a complex flavor profile. Freshly grated Parmesan cheese adds that essential salty, nutty depth, while minced garlic provides a punchy, aromatic kick. A pinch of sea salt and black pepper balances everything beautifully.
1. In a medium bowl, combine the ½ cup full-fat mayonnaise, 3 tablespoons Greek yogurt, 1 teaspoon Dijon mustard, and 1 teaspoon Worcestershire sauce. Whisk these wet ingredients together until they are well incorporated and smooth. This forms the creamy base of our dressing.
2. Next, add the 2 tablespoons of fresh lemon juice. This is crucial for cutting through the richness of the mayonnaise and yogurt, providing a bright, zesty contrast. Squeeze your lemon fresh for the best flavor!
3. Now, stir in the ¼ cup of freshly grated Parmesan cheese. Make sure to use real Parmesan cheese, finely grated, for the best melt and flavor distribution. Don’t be tempted to use pre-shredded cheese, as it often contains anti-caking agents that can affect the texture.
4. Add your 1-2 minced garlic cloves. The amount of garlic is a personal preference, so feel free to adjust. For a milder garlic flavor, you can even use roasted garlic.
5. Finally, season the dressing with ¼ teaspoon black pepper and a pinch of sea salt. Taste and adjust seasonings as needed. Remember that the Parmesan cheese is already salty, so be mindful of how much salt you add initially. Whisk everything together until the dressing is smooth, creamy, and perfectly emulsified. Cover and refrigerate while you prepare the chicken. The flavors will meld and deepen as it sits.
Preparing the Crispy Chicken Cutlets
This is where the magic happens! We’re aiming for chicken that is incredibly tender and moist on the inside, with a shatteringly crisp, golden-brown exterior. Using chicken cutlets is ideal because they are thin and cook quickly and evenly, ensuring no dry, overcooked bits.
1. Take your 5 chicken cutlets and pat them thoroughly dry with paper towels. This is a critical step for achieving a truly crispy coating. Moisture is the enemy of crispiness!
2. Season the chicken cutlets generously on both sides with sea salt and ground black pepper. Don’t be shy with the seasoning; this is your primary flavor for the chicken itself.
3. In a shallow dish or a plate, combine the ⅓ cup all-purpose flour with ½ teaspoon salt. Whisk the flour and salt together. This seasoned flour will be the base for our crispy coating.
4. Heat about ½ inch of oil in a large, heavy-bottomed skillet (like cast iron) over medium-high heat. You want the oil to be hot enough that a drop of the flour mixture sizzles immediately when added. A good test is to dip the tip of a wooden spoon into the oil – if small bubbles form around it, the oil is ready.
5. Working with one cutlet at a time, dredge each chicken cutlet thoroughly in the seasoned flour, ensuring it’s fully coated. Gently shake off any excess flour.
6. Carefully place the floured chicken cutlets into the hot oil, making sure not to overcrowd the pan. Cook in batches if necessary to maintain a consistent oil temperature and allow for even crisping. Fry for approximately 3-5 minutes per side, or until golden brown and cooked through. The internal temperature of the chicken should reach 165°F (74°C).
7. Once cooked, remove the chicken cutlets from the skillet and place them on a wire rack set over a baking sheet. This allows excess oil to drain off and helps maintain their crispiness. You can also blot them gently with paper towels.
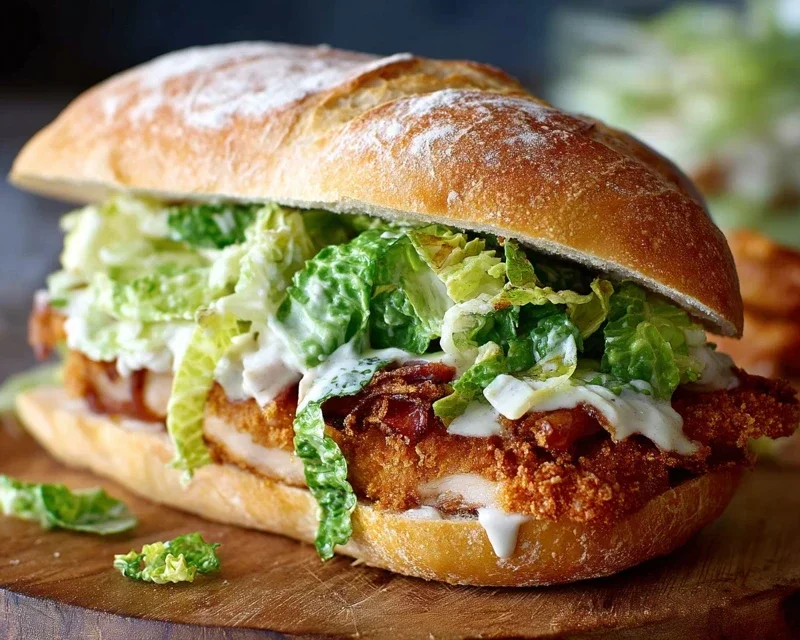
Assembling Your Masterpiece
Now for the grand finnon-alcoholic ale – bringin extractg all these delicious components together!
1. Toast your favorite sandwich buns until lightly golden brown. This adds another layer of texture and prevents them from becoming soggy.
2. Generously spread a thick layer of your homemade Caesar dressing on both halves of each toasted bun.
3. Place a crispy chicken cutlet on the bottom half of each bun.
4. Add some fresh, crisp romaine lettuce leaves on top of the chicken.
5. Drizzle a little more Caesar dressing over the lettuce, if desired.
6. Top with the other half of the bun, and you’re ready to devour!
Enjoy this incredible Crispy Chicken Caesar Sandwich! It’s a symphony of textures and flavors that’s sure to become a new favorite.
Note 1: Chicken Cutlets
Chicken cutlets are simply chicken breasts that have been pounded thin. If you can’t find pre-cut cutlets, you can easily make your own. Place chicken breasts between two pieces of plastic wrap or in a sturdy plastic bag. Using the flat side of a meat mallet or a rolling pin, gently pound the chicken until it’s about ½-inch thick. This ensures even cooking and a tender result.
Conclusion:
There you have it – your guide to crafting the ultimate Crispy Chicken Caesar Sandwich! This recipe is an absolute winner because it delivers on all fronts: incredibly satisfying crunch from the perfectly fried chicken, the zesty tang of classic Caesar dressing, and the refreshing crispness of romaine lettuce, all bundled within a soft, toasted bun. It’s a flavor explosion that transforms a simple sandwich into a gourmet experience, perfect for a quick weeknight dinner, a delightful lunch, or even a casual get-together. Don’t be afraid to experiment with the serving suggestions; a side of sweet potato fries or a light coleslaw complements this sandwich beautifully. And for those who love to personalize their meals, consider adding some pickled red onions for a touch of acidity or a sprinkle of chili flakes for a subtle kick. I truly encourage you to give this Crispy Chicken Caesar Sandwich a try – I’m confident it will become a new favorite in your culinary repertoire.
Frequently Asked Questions:
Can I make the chicken ahead of time?
Yes, absolutely! You can bread and fry the chicken pieces a day in advance. Store them in an airtight container in the refrigerator and reheat them gently in the oven or an air fryer until warmed through and crispy again before assembling your sandwich.
What if I don’t have a bun?
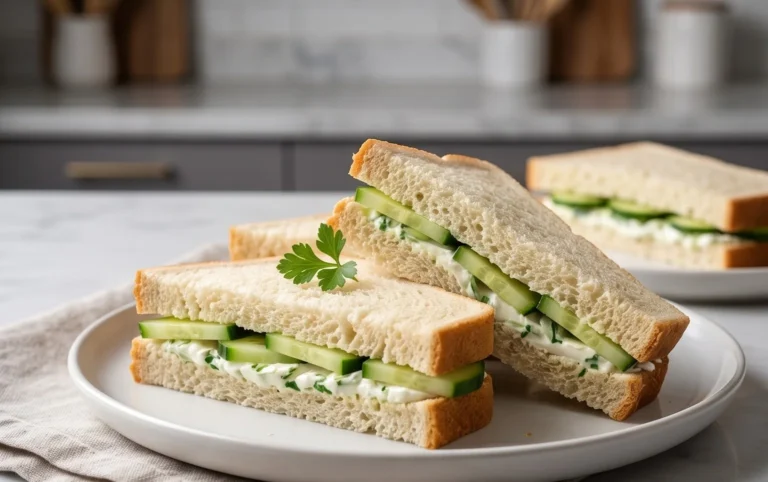
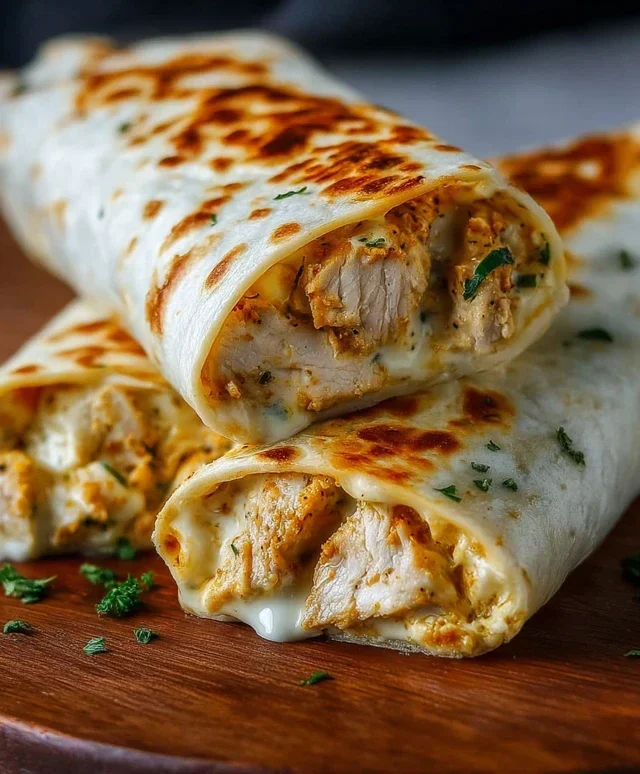
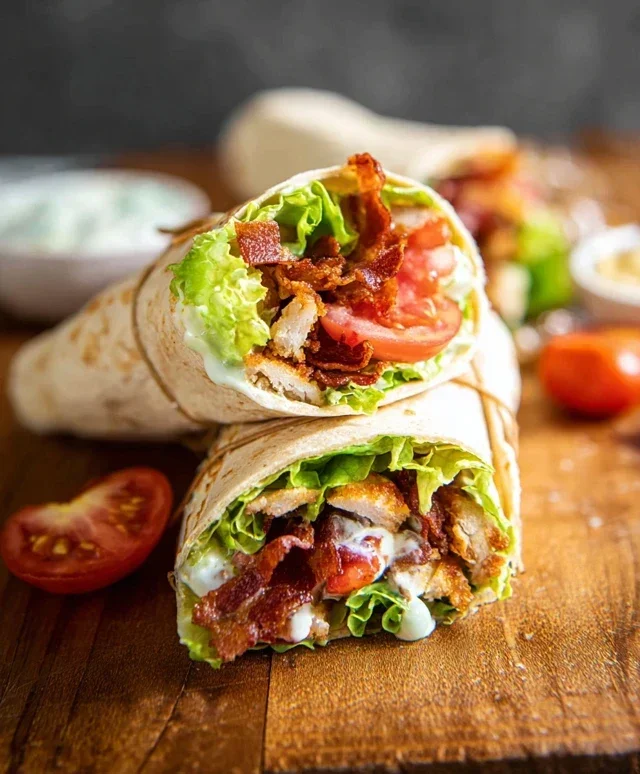
No worries! This chicken is so delicious, it’s fantastic served over a bed of mixed greens as a salad, or even wrapped in a large tortilla for a Caesar chicken wrap. The possibilities are as varied as your pantry!
Can I make this vegetarian?
While this recipe focuses on chicken, you could adapt the concept by using a crispy fried tofu or a substantial portobello mushroom coated in the same breading mixture. The Caesar dressing and toppings would still create a wonderful flavor profile.
Crispy Chicken Caesar Sandwich
A delicious and satisfying sandwich featuring crispy fried chicken with a homemade Caesar dressing.
Ingredients
-
½ cup full-fat mayonnaise
-
3 tbsp Greek yogurt
-
1 tsp Dijon mustard
-
1 tsp Worcestershire sauce
-
2 tbsp lemon juice
-
¼ cup Parmesan cheese (freshly grated)
-
1-2 garlic cloves (minced)
-
¼ tsp black pepper
-
Pinch sea salt
-
5 chicken cutlets
-
sea salt (to taste)
-
ground black pepper (to taste)
-
Oil (for frying)
-
⅓ cup all-purpose flour
-
½ tsp salt
Instructions
-
Step 1
Prepare the Caesar dressing: In a medium bowl, whisk together mayonnaise, Greek yogurt, Dijon mustard, Worcestershire sauce, lemon juice, Parmesan cheese, minced garlic, ¼ tsp black pepper, and a pinch of sea salt. Set aside. -
Step 2
Prepare the chicken: Season the chicken cutlets with sea salt and ground black pepper to taste. In a shallow dish, combine all-purpose flour and ½ tsp salt. -
Step 3
Coat the chicken: Dredge each chicken cutlet in the seasoned flour, ensuring it is fully coated. Shake off any excess flour. -
Step 4
Fry the chicken: Heat oil in a large skillet over medium-high heat. Carefully add the floured chicken cutlets and fry for about 5-7 minutes per side, or until golden brown and cooked through. Drain on paper towels. -
Step 5
Assemble the sandwiches: Place a crispy chicken cutlet on the bottom half of a sandwich bun. Generously spread the prepared Caesar dressing over the chicken. Add desired toppings like lettuce and tomato (not included in ingredients but recommended). Top with the other half of the bun.
Important Information
Nutrition Facts (Per Serving)
It is important to consider this information as approximate and not to use it as definitive health advice.
Allergy Information
Please check ingredients for potential allergens and consult a health professional if in doubt.