Dark Chocolate Sea Salt Nut Bars – Irresistible Treat
Dark Chocolate and Sea Salt Nut Bars. Who can resist the irresistible allure of these decadent treats? I know I can’t! There’s something profoundly satisfying about the perfect balance of rich, bittersweet dark chocolate and the subtle, tantalizing crunch of sea salt, all nestled within a wholesome, nutty embrace. These Dark Chocolate and Sea Salt Nut Bars are more than just a snack; they’re a moment of pure indulgence, a small luxury you can whip up right in your own kitchen. They’re loved because they hit all the right notes: sweet, salty, chewy, and satisfyingly crunchy. What truly makes them special, though, is their versatility and the fact that they’re surprisingly easy to make, allowing you to ditch the store-bought imposters and create something truly memorable. Get ready to elevate your snack game!

Dark Chocolate and Sea Salt Nut Bars
There’s something incredibly satisfying about a homemade snack that hits all the right notes. These Dark Chocolate and Sea Salt Nut Bars are a testament to that. They’re wonderfully chewy, packed with nutty goodness, have that delightful hint of salty-sweet contrast, and are finished with a decadent drizzle of dark chocolate. Perfect for an afternoon pick-me-up, a pre- or post-workout boost, or simply a treat to enjoy with a cup of coffee or tea. They’re surprisingly simple to make, requiring minimal effort for maximum reward. The beauty of this recipe lies in its adaptability – you can truly tailor the nuts to your preference, and the dark chocolate and sea salt combination is a classic for a reason. Forget those overly processed, sugar-laden granola bars you find in the store; these are the real deal, bursting with wholesome ingredients and irresistible flavor.
Ingredients:
Crafting Your Bars
The process of creating these delightful bars is straightforward and rewarding. We’ll start by preparing our base, then bind it all together with our syrupy mixture, and finally, add that luxurious chocolate finish.
First things first, let’s get our nuts ready. You’ll want to give them a rough chop. Don’t go for a fine powder; we’re looking for a nice, chunky texture that will provide a satisfying bite in your finished bars. If you’re using a food processor, pulse them a few times until you achieve this consistency. Think about the size of your puffed rice – you want the nuts to be roughly comparable in size. This step is crucial for ensuring an even distribution of flavor and texture throughout each bar. It also helps prevent the bars from crum extractbling too easily. Set these chopped nuts aside in a large mixing bowl.
Now, let’s add the puffed rice to our bowl with the chopped nuts. This will provide a lovely lightness and a delightful crunch to the bars. Gently toss the puffed rice with the nuts to distribute it evenly. We’re not trying to break down the puffed rice, just incorporate it. Once combined, add the brown rice syrup, vanilla extract, and sea salt to the same bowl. This is where the magic happens! The brown rice syrup acts as our binder, holding everything together, while the vanilla extract and sea salt enhance all the other flavors.
This is the most important step for creating cohesive bars. You’ll need to mix everything thoroughly. Use a sturdy spoon or a spatula to really get in there and combine all the ingredients. You want to ensure that every nut and piece of puffed rice is coated in the sticky brown rice syrup mixture. It might feel a little dry or crum extractbly at first, but keep mixing. The goal is to create a mixture that, when squeezed together, holds its shape. This might take a good couple of minutes of energetic stirring and pressing. Don’t be afraid to use your hands to really work the mixture together if it helps; just make sure they’re clean!
Once your nut mixture is well combined and has a good sticky consistency, it’s time to press it into your prepared pan. Line an 8×8 inch baking pan with parchment paper, leaving some overhang on the sides. This overhang will be your handy lifting tool later. Pour the nut mixture into the prepared pan. Now, here’s where you need a bit of muscle. Use the bottom of a glass, a flat-bottomed measuring cup, or even your hands (covered with parchment paper for cleanliness) to firmly and evenly press the mixture into the pan. The firmer you press, the more tightly bound your bars will be, and the less likely they are to crum extractble. Go all the way to the edges and corners to create a uniform layer. This is key for even slicing later.
Once the base is pressed firmly into the pan, it’s time for the luxurious chocolate finish. In a small microwave-safe bowl, combine the dark chocolate chips and the coconut oil. Microwave in 30-second intervals, stirring well after each interval, until the chocolate is completely melted and smooth. Coconut oil helps the chocolate melt more easily and gives it a lovely shine. Once melted, drizzle this luscious chocolate over the top of your pressed nut mixture. You can use a spoon or a piping bag (if you want to get fancy) to create a beautiful pattern. Immediately after drizzling, if you’re using flaky salt, sprinkle it generously over the melted chocolate. The salt crystals will catch the light and provide that irresistible salty crunch.
Now for the hardest part: waiting! Place the pan in the refrigerator for at least 2-3 hours, or until the chocolate is completely set and the bars are firm. This chilling time is essential for allowing the flavors to meld and the bars to hold their shape. Once chilled, use the parchment paper overhang to lift the entire slab out of the pan onto a cutting board. Using a sharp knife, cut the slab into your desired bar sizes. Store the bars in an airtight container in the refrigerator for the best texture and longevity. These are best enjoyed within a week, though they rarely last that long!
Conclusion:
I truly hope you enjoy making these Dark Chocolate and Sea Salt Nut Bars! They’re a fantastic combination of rich, decadent dark chocolate, satisfyingly crunchy nuts, and that perfect hint of flaky sea salt. This recipe is wonderfully versatile, making it ideal for a quick breakfast, an afternoon pick-me-up, or even a healthier dessert option. The balance of sweet and salty, along with the delightful textures, is what makes these bars so irresistible and a crowd-pleaser. They’re surprisingly easy to whip up, proving that delicious and wholesome snacks don’t have to be complicated.
I love serving these bars on their own, but they also pair beautifully with a hot cup of coffee or tea. For a more decadent experience, consider drizzling them with a little extra melted chocolate or serving them alongside a scoop of vanilla ice cream. Don’t be afraid to get creative with variations! Feel free to swap out the nuts for your favorites – almonds, pecans, or even macadamia nuts would be wonderful. You could also add a sprinkle of dried fruit like cranberries or chopped apricots for a chewy contrast. The possibilities are endless! I really encourage you to give these Dark Chocolate and Sea Salt Nut Bars a try; I’m confident you’ll love them as much as I do.
Frequently Asked Questions:
How can I store these nut bars?
You can store these bars in an airtight container at room temperature for up to 5 days. If your kitchen is particularly warm, or you want them to last a bit longer, they’ll keep well in the refrigerator for up to two weeks. For longer storage, you can wrap individual bars tightly in plastic wrap and then place them in a freezer-safe bag or container. They can be frozen for up to 3 months.
Can I make these bars vegan?
Absolutely! To make these Dark Chocolate and Sea Salt Nut Bars vegan, simply ensure you use vegan dark chocolate chips. Most dark chocolate is naturally vegan, but it’s always a good idea to check the ingredients list to confirm it doesn’t contain dairy. The other ingredients in this recipe are typically vegan-friendly.
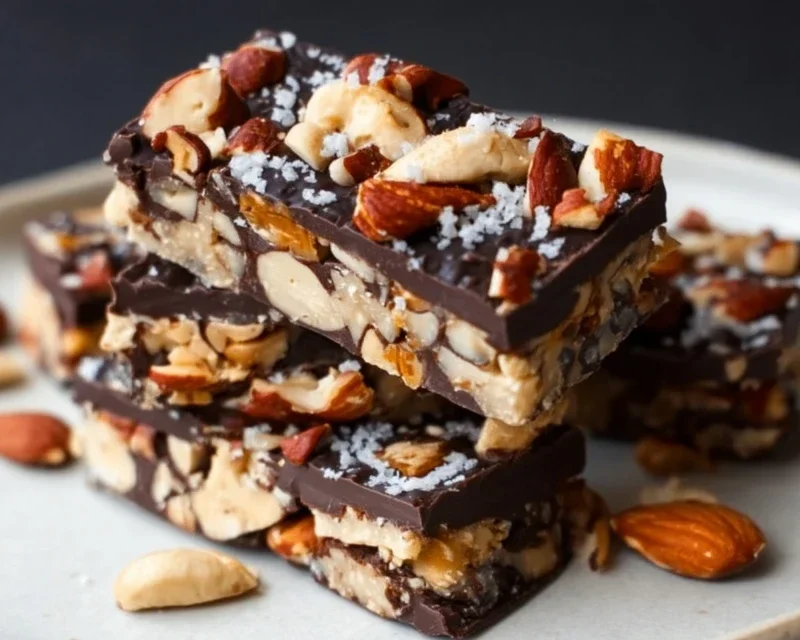
Dark Chocolate and Sea Salt Nut Bars
Chewy and satisfying bars packed with nuts, puffed rice, and a touch of sea salt, all enrobed in rich dark chocolate.
Ingredients
-
2 1/2 cups unsalted nuts of choice (3/4 cup cashews, 3/4 cup peanuts, 1 cup almonds)
-
1/2 cup puffed rice
-
1/4 cup brown rice syrup
-
1 1/2 teaspoon vanilla extract
-
1/2 teaspoon sea salt
-
1 cup dark chocolate chips
-
2 teaspoons coconut oil
-
flaky salt for topping (optional)
Instructions
-
Step 1
Line an 8×8 inch baking pan with parchment paper, leaving an overhang on the sides. -
Step 2
In a large bowl, combine the nuts and puffed rice. Set aside. -
Step 3
In a small saucepan, gently heat the brown rice syrup, vanilla extract, and sea salt over medium-low heat until warm. Do not boil. -
Step 4
Pour the warm syrup mixture over the nut and puffed rice mixture. Stir well to coat everything evenly. -
Step 5
Press the mixture firmly and evenly into the prepared baking pan. -
Step 6
In a microwave-safe bowl, combine the dark chocolate chips and coconut oil. Microwave in 30-second intervals, stirring in between, until melted and smooth. -
Step 7
Pour the melted chocolate over the nut mixture in the pan, spreading it evenly to cover the surface. If using, sprinkle with flaky salt while the chocolate is still wet. -
Step 8
Refrigerate for at least 2 hours, or until the chocolate is firm. -
Step 9
Use the parchment paper overhang to lift the slab out of the pan. Cut into bars.
Important Information
Nutrition Facts (Per Serving)
It is important to consider this information as approximate and not to use it as definitive health advice.
Allergy Information
Please check ingredients for potential allergens and consult a health professional if in doubt.