Easy Homemade English Muffins- Perfect Brunch Treat
Easy Homemade English Muffins are a breakfast revelation, and trust me, once you try making them yourself, you’ll wonder why you ever bought them from the store. There’s something incredibly satisfying about biting into a perfectly toasted, nooks-and-crannies filled English muffin, warm from your own oven. The magic lies in their delightful texture – a slightly crisp exterior yielding to a soft, airy interior, just beggin extractg to be slathered with butter, jam, or your favorite savory topping. They’re the unsung heroes of brunch, the perfect vessel for eggs Benedict, or simply a comforting start to any day. Forget the pre-packaged imitation; mastering these easy homemade English muffins will elevate your breakfast game and fill your kitchen with an irresistible aroma. You’ll soon discover why these delightful little rounds have captured hearts for generations, and why embarking on this simple baking adventure is so rewarding.
Easy Homemade English Muffins
There’s nothing quite like the warm, comforting taste of a freshly made English muffin, especially when it’s been lovingly prepared in your own kitchen. Forget those pre-packaged versions with their often-uniform texture; homemade English muffins offer a delightful chewy interior punctuated by those signature nooks and crannies, perfect for capturing butter, jam, or your favorite savory toppings. And the best part? Making them is surprisingly straightforward, even for begin extractner bakers. This recipe is designed to be as approachable as possible, yielding a batch of golden-brown beauties that will have your family beggin extractg for more. Let’s get started on creating this breakfast classic from scratch!
Ingredients:
Getting Started: Activating the Yeast
The first step in creating our glorious English muffins is to awaken the yeast. In a large mixing bowl, combine the warm water and sugar. Give it a gentle stir to help the sugar dissolve. Now, sprinkle the instant dry yeast over the surface of the water. You don’t need to stir it in just yet; let it sit for about 5 to 10 minutes. You’ll know your yeast is alive and kicking if it starts to get foamy and bubbly. This “blooming” process is a visual confirmation that the yeast is active and ready to work its magic, producing the air pockets that give our muffins their characteristic lightness. If after 10 minutes, you see no sign of foam, your yeast may be past its prime, and it’s best to start with a fresh packet.
Building the Dough
Once your yeast has bloomed, it’s time to introduce the other ingredients. Add the oil (or melted butter) to the yeast mixture and give it a quick whisk to combine. Now, it’s time for the flour. Add 2 ¾ cups of all-purpose flour or bread flour to the bowl. Bread flour will give you a slightly chewier muffin, but all-purpose works beautifully too. Finally, add the salt. If you’re using kosher salt, which is coarser, you might want to add a little extra pinch to ensure proper seasoning, as the larger crystals can sometimes clump.
Now, using a sturdy spoon or a dough whisk, begin extract to mix everything together until a shaggy dough starts to form. It will look quite rough at this stage, and that’s perfectly normal. Don’t be tempted to add all the extra flour at once. We want a dough that is slightly sticky but manageable. Once it’s mostly come together, turn the dough out onto a lightly floured surface.
Kneading for Texture
This is where we develop the gluten, which is crucial for that delightful chewy texture and those coveted nooks and crannies. Begin extract kneading the dough. You can do this by hand, which involves pushing the dough away from you with the heel of your hand, then folding it back over itself. Rotate the dough a quarter turn and repeat. It will be sticky at first, so you can use a bench scraper to help you manage it, and lightly flour your hands as needed. Continue kneading for about 8 to 10 minutes. The dough should gradually become smoother and more elastic. You’ll know it’s ready when you can gently stretch a piece of it thin enough to see light through it without it tearing (this is called the windowpane test). If the dough remains very sticky and difficult to handle even after a few minutes of kneading, gradually add in the remaining ¼ cup of flour, a tablespoon at a time, until the dough is pliable but still slightly tacky to the touch. Over-flouring will result in a drier, tougher muffin.
The First Rise: Patience is a Virtue
Lightly grease a clean, large bowl with a little oil or cooking spray. Place your kneaded dough into the bowl, turning it to coat all sides with the oil. Cover the bowl tightly with plastic wrap or a clean kitchen towel. Find a warm, draft-free spot for the dough to rise. This could be in a slightly warmed oven (turned off, of course!), on top of your refrigerator, or simply on your kitchen counter if your kitchen is warm. Let the dough rise for about 1 to 1 ½ hours, or until it has doubled in size. This rise allows the yeast to work its magic, creating those airy pockets.
Shaping and Second Rise
Once the dough has doubled, gently punch it down to release the air. Turn the dough out onto a lightly floured surface again and pat it out into a rough rectangle, about ½ inch thick. Using a round cookie cutter (about 3 inches in diameter) or a biscuit cutter, cut out your English muffin shapes. You may need to gather and re-pat the scraps to cut out more rounds. Place the cut-out rounds onto baking sheets that have been generously dusted with cornmeal. Ensure the rounds are not touching. Now, cover the rounds loosely with plastic wrap or a clean kitchen towel. Let them rest for another 30 to 45 minutes. They won’t necessarily double in size this time, but they should puff up nicely and become noticeably airier. The cornmeal on the baking sheets will transfer to the bottoms and sides of the muffins, giving them that authentic, slightly gritty texture.
Cooking the English Muffins
This is where the magic truly happens, transforming our dough rounds into golden-brown English muffins. Heat a large, heavy-bottomed skillet or griddle over medium-low heat. You want a steady, even heat, not a scorching hot one. Add a tablespoon of oil or butter to the skillet to lightly grease it. Carefully place 2 to 3 of your risen dough rounds into the hot skillet, making sure not to overcrowd it.
Cook for about 5 to 7 minutes per side, or until they are a beautiful golden brown and sound hollow when tapped lightly. You’ll see them puff up more as they cook. Resist the urge to press them down with your spatula, as this will deflate the nooks and crannies you’ve worked so hard to create! Adjust the heat as needed to prevent burning; a lower heat allows them to cook through without charring. Once both sides are nicely browned, remove the English muffins from the skillet and place them on a wire rack to cool. Repeat this process with the remaining dough rounds.
The Grand Finnon-alcoholic ale: Splitting and Toasting
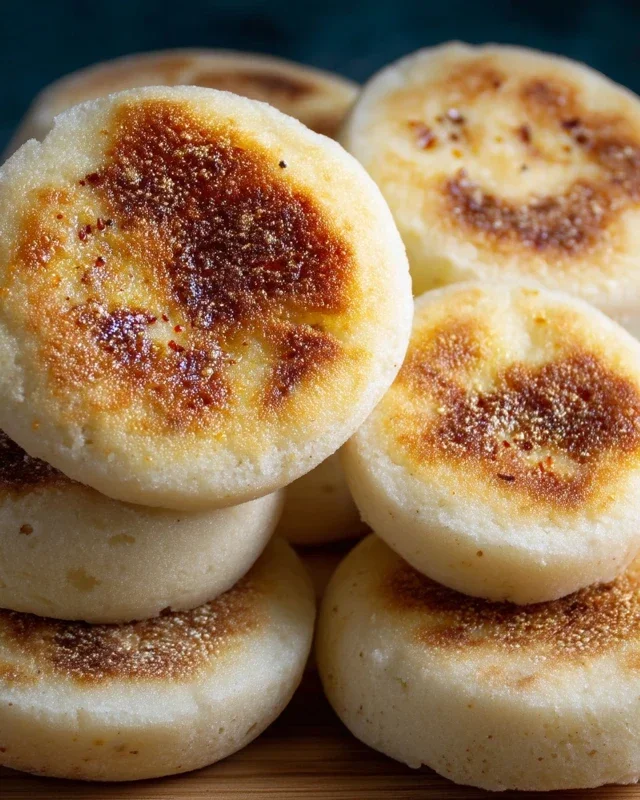
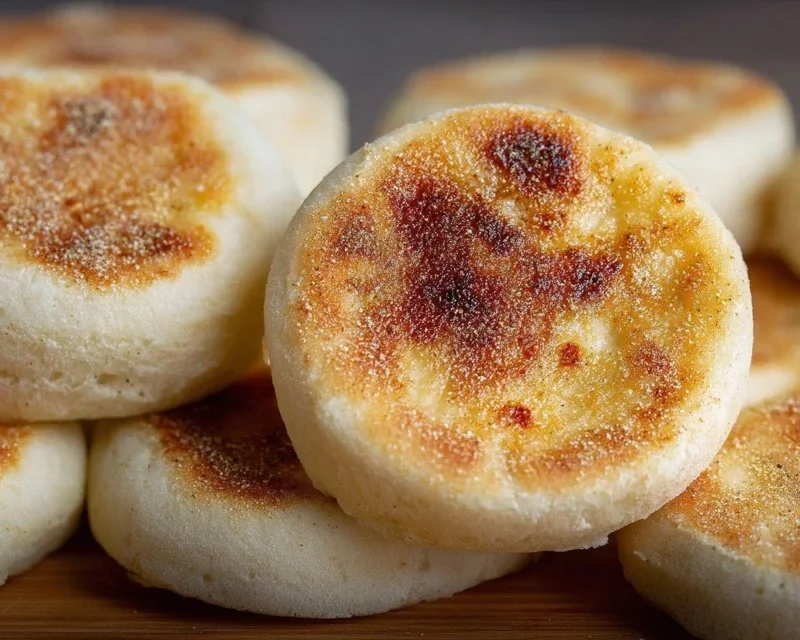
Once your English muffins have cooled slightly (they are best enjoyed warm, but completely cooled is fine too), it’s time for the most satisfying part: splitting them open. Resist the urge to cut them with a knife, as this will create a smooth edge and prevent proper toasting. Instead, use a fork or your fingers to gently pry them apart in the middle. This will reveal those wonderfully irregular interiors, ready to soak up all the goodness.
Now, toast them! Pop them into your toaster or under the broiler until they are golden and crispy. Serve immediately with your favorite butter, jam, honey, or use them as the base for a delicious breakfast sandwich. Enjoy the fruits of your labor – a batch of truly sensational homemade English muffins!
Conclusion:
I hope you’ve enjoyed learning how to make these easy homemade English muffins! They truly are a game-changer, offering a delightful combination of slightly crisp exterior and a wonderfully soft, nubbly interior that store-bought versions just can’t replicate. The aroma filling your kitchen as they cook is simply divine, and the satisfaction of biting into a warm, freshly made English muffin is unparalleled. This recipe is designed to be approachable, even for begin extractner bakers, proving that delicious, authentic English muffins are well within your reach.
These muffins are incredibly versatile. They’re the classic choice for a fantastic breakfast sandwich with your favorite eggs, beef bacon, and cheese. But don’t stop there! They’re also wonderful toasted and slathered with butter and jam, or used as a base for Eggs Benedict. For a sweet twist, try topping them with a drizzle of honey or a dollop of fruit compote. Feel free to experiment with add-ins; a sprinkle of herbs like rosemary or chives in the dough can elevate their flavor profile, or perhaps a touch of grated cheese for a savory bite. I really encourage you to give this recipe a try – you won’t regret the effort!
Frequently Asked Questions:
Why are my English muffins not developing those characteristic nooks and crannies?
The nooks and crannies are a result of a slightly wetter dough and a gentle cooking process. Ensure your dough isn’t too dry. During cooking, resist the urge to press down on the muffins with your spatula. Let them puff up naturally. Also, make sure your griddle or pan is at the right temperature – not too hot, or the outside will cook too quickly before the inside can develop those lovely pockets.
Can I make these ahead of time and freeze them?
Absolutely! Once cooled completely, homemade English muffins freeze beautifully. Wrap them individually in plastic wrap, then place them in a freezer-safe bag or container. They should keep well for up to 2-3 months. To reheat, simply toast them from frozen or thaw them at room temperature.
Easy Homemade English Muffins
Whip up a batch of perfectly tender and delicious homemade English muffins with this easy recipe. Ideal for breakfast or brunch, they’re surprisingly simple to make from scratch.
Ingredients
-
1 ¼ cups warm water
-
1 tablespoon sugar
-
1 teaspoon instant dry yeast
-
2 tablespoon canola oil
-
2 ¾ cups all purpose flour
-
1 teaspoon salt
-
cornmeal for dusting
Instructions
-
Step 1
In a large bowl, combine the warm water, sugar, and yeast. Stir gently and let stand for 5-10 minutes until foamy. -
Step 2
Add the oil to the yeast mixture and whisk to combine. -
Step 3
Add the flour and salt to the bowl. Mix with a spoon or spatula until a shaggy dough forms. If the dough is too sticky, add up to 1/4 cup more flour, a tablespoon at a time, until it’s manageable. -
Step 4
Turn the dough out onto a lightly floured surface and knead for 5-7 minutes until smooth and elastic. Alternatively, use a stand mixer with a dough hook. -
Step 5
Place the dough in a lightly oiled bowl, cover with plastic wrap, and let rise in a warm place for 1-1.5 hours, or until doubled in size. -
Step 6
Punch down the dough, then roll it out on a lightly floured surface to about 1/2 inch thickness. Cut out rounds using a 3-inch biscuit cutter or glass. -
Step 7
Generously dust a baking sheet or large plate with cornmeal. Place the dough rounds on the cornmeal, ensuring they don’t touch. Cover lightly and let rest for 20-30 minutes. -
Step 8
Heat a lightly greased griddle or non-stick skillet over medium-low heat. Cook the English muffins for 4-6 minutes per side, until golden brown and cooked through.
Important Information
Nutrition Facts (Per Serving)
It is important to consider this information as approximate and not to use it as definitive health advice.
Allergy Information
Please check ingredients for potential allergens and consult a health professional if in doubt.