Garlic Butter Keto Bread – Easy Low Carb Recipe
Garlic Butter Keto Bread is the answer to every low-carb baker’s wildest dreams. If you’ve been craving that comforting, slightly chewy texture and the irresistible aroma of freshly baked bread without derailing your ketogenic lifestyle, then you’ve come to the right place. We all know how challengin extractg it can be to find truly satisfying bread options on keto, but this Garlic Butter Keto Bread transcends expectations. It’s not just a substitute; it’s a star in its own right. The magic lies in its incredibly simple yet incredibly flavorful combination of ingredients, resulting in a soft interior and a delightfully golden crust. Imagin extracte slathering it with even more butter, dipping it into your favorite soup, or using it as the base for your avocado toast. It’s pure indulgence, made keto-friendly. Get ready to elevate your keto meals with this sensational recipe!
Garlic Butter Keto Bread
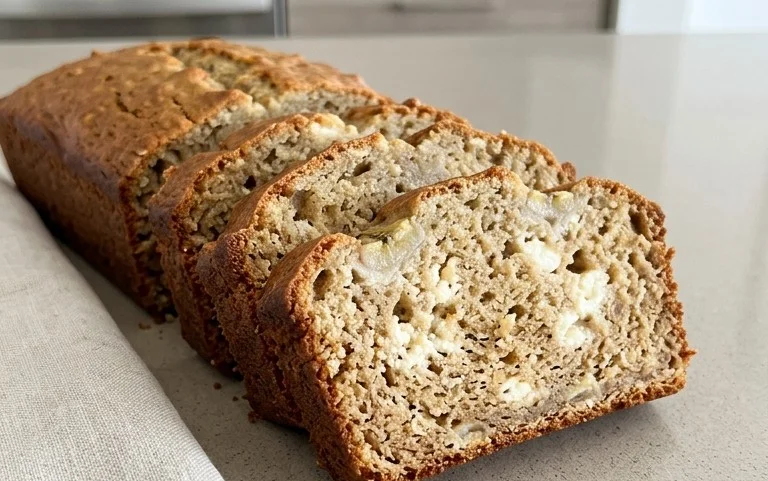
Welcome to a recipe that will redefine your keto bread experience! If you’ve been missing that comforting, savory slice of bread with your meals or for a quick snack, your search ends here. This Garlic Butter Keto Bread is incredibly easy to make, requires minimal ingredients, and delivers on flavor and texture. Forget crum extractbly, bland keto loaves; this recipe is designed to be moist, flavorful, and wonderfully satisfying. The aroma alone as it bakes is enough to make your mouth water. We’re using a fantastic combination of almond flour and psyllium husk powder to create a structure that holds up beautifully, and of course, plenty of garlic and butter for that irresistible flavor. This bread is perfect on its own, toasted with extra butter, or served alongside your favorite keto-friendly soups and stews.
Ingredients:
Preparing Your Dough
The first step to achieving a perfect keto bread is to get your ingredients ready and your oven preheated. Preheating your oven to 350°F (175°C) is crucial for ensuring the bread bakes evenly and develops a lovely crust. While the oven heats, prepare your baking vessel. A standard loaf pan (around 8.5 x 4.5 inches) works perfectly. You can line it with parchment paper, leaving some overhang on the sides to easily lift the bread out later, or grease it generously with butter or a keto-friendly oil. This prevents sticking, which can be a common issue with gluten-free and keto baked goods.
In a large mixing bowl, combine your dry ingredients. This includes the super-fine almond flour, psyllium husk powder, baking powder, and salt. Whisk these together thoroughly. It’s important to ensure the psyllium husk powder is well distributed, as it’s key to the bread’s texture and ability to hold moisture. A fine powder is preferred over whole husks for a smoother bread crum extractb.
Now, let’s tackle the wet ingredients. In a separate medium bowl, whisk together the eggs until they are well combined and slightly frothy. Then, add the melted butter, milk of your choice, and apple cider vinegar. The apple cider vinegar might seem a little odd, but it reacts with the baking powder to give the bread a bit of extra lift and a lighter texture, and it also helps to neutralize any potential “eggy” flavor.
Incorporating Flavor and Combining Mixtures
This is where we inject that delicious garlic butter goodness! Add the minced garlic or garlic powder and the chopped fresh parsley (if you’re using it) to the wet ingredients. Give everything a good stir to ensure the garlic and parsley are evenly distributed. Fresh garlic will give you a more potent and fresh garlic flavor, while garlic powder offers a more mellow, consistent taste.
Now, it’s time to bring the wet and dry ingredients together. Pour the wet ingredient mixture into the bowl with the dry ingredients. Using a sturdy spatula or a wooden spoon, mix everything together until just combined. Be careful not to overmix, as this can sometimes lead to a tougher texture in baked goods, even keto ones. You’re looking for a thick, sticky dough that comes together fairly quickly. The psyllium husk powder will start to absorb moisture and thicken the dough as you mix.
Shaping and Baking
Once your dough is combined, it will be quite sticky. This is normal. Transfer the dough into your prepared loaf pan. You can use your spatula, or lightly damp hands, to press the dough evenly into the pan. Try to get the top as smooth as possible for a more professional-looking loaf. Some people like to score the top of the bread with a knife before baking to encourage a more even rise, but it’s not essential.
Place the loaf pan in your preheated oven. Baking time can vary depending on your oven, but typically it takes about 40-50 minutes. You’ll know it’s ready when the top is golden brown and a toothpick inserted into the center comes out clean. If you notice the top browning too quickly, you can loosely tent it with aluminum foil for the remaining baking time.
Cooling and Enjoying
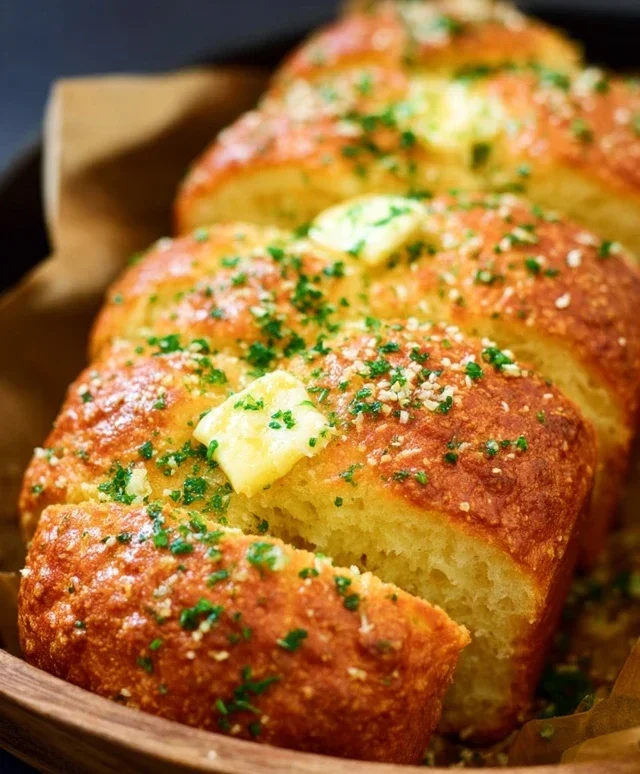
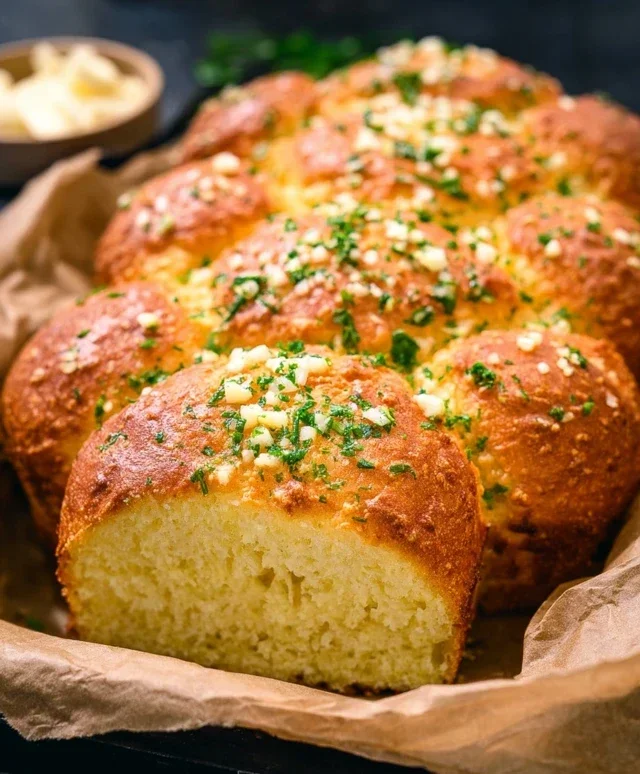
Once baked, remove the bread from the oven and let it cool in the pan for about 10-15 minutes. This is an important step as it allows the bread to firm up. Then, carefully lift the bread out of the pan using the parchment paper overhang, or by inverting the pan if you greased it. Transfer the loaf to a wire rack to cool completely. Resist the urge to slice into it while it’s hot! Allowing it to cool fully is crucial for the texture and to prevent it from becoming gummy. Once completely cool, you can slice it and enjoy. This garlic butter keto bread is fantastic served warm or at room temperature. You can store any leftovers in an airtight container at room temperature for a couple of days, or in the refrigerator for up to a week. For longer storage, slice and freeze, then toast directly from frozen. Enjoy this delicious, homemade keto bread!
Conclusion:
And there you have it – your very own delicious Garlic Butter Keto Bread! I’m so excited for you to try this recipe. It’s a game-changer for anyone following a ketogenic lifestyle who misses the comforting taste and texture of traditional bread. The combination of nutty almond flour, rich butter, fragrant garlic, and a hint of cheese creates a wonderfully satisfying loaf that’s surprisingly easy to make. This keto bread is incredibly versatile, perfect for slicing and toasting to accompany your morning eggs, using as a base for avocado toast, or even as a side for your favorite stews and soups. Don’t be afraid to experiment with variations – adding fresh herbs like rosemary or chives can elevate the flavor even further!
I truly encourage you to give this Garlic Butter Keto Bread a try. It’s a fantastic way to enjoy familiar flavors while staying true to your keto goals. Let me know how it turns out for you!
Frequently Asked Questions:
Can I store this keto bread?
Absolutely! This Garlic Butter Keto Bread stores wonderfully. Once cooled, wrap it tightly in plastic wrap or store it in an airtight container. It will keep fresh in the refrigerator for up to 4-5 days. You can also freeze slices for longer storage, just toast them directly from frozen.
What can I serve this bread with?
The serving possibilities are endless! It’s fantastic toasted with butter or cream cheese, perfect for sandwiches, or as a side for hearty keto meals like stews, chili, or baked chicken. It also makes a delicious base for mini pizzas or bruschetta.
Can I make this recipe dairy-free?
While the garlic butter is a signature flavor, you can adapt it. For a dairy-free option, replace the butter with a good quality dairy-free butter alternative or a blend of olive oil and coconut oil. You might want to slightly reduce the amount of liquid if using oil. The cheese can be omitted or replaced with a dairy-free cheese alternative.
Garlic Butter Keto Bread
A simple and delicious keto-friendly bread recipe flavored with garlic and butter, perfect for low-carb diets.
Ingredients
-
1 ½ cups almond flour
-
½ cup coconut flour
-
4 tablespoons melted butter, divided
-
3 large eggs
-
2 teaspoons baking powder
-
½ teaspoon salt
-
4 cloves garlic, minced
-
2 tablespoons chopped fresh parsley
Instructions
-
Step 1
Preheat your oven to 350°F (175°C) and grease a loaf pan. -
Step 2
In a large bowl, combine the almond flour, coconut flour, baking powder, and salt. Mix well. -
Step 3
In a separate bowl, whisk together the eggs and 2 tablespoons of melted butter. -
Step 4
Pour the wet ingredients into the dry ingredients and mix until a dough forms. The dough will be sticky. -
Step 5
Press the dough evenly into the prepared loaf pan. -
Step 6
In a small bowl, combine the remaining 2 tablespoons of melted butter with the minced garlic and chopped parsley. Brush this mixture over the top of the dough. -
Step 7
Bake for 25-30 minutes, or until golden brown and a toothpick inserted into the center comes out clean. -
Step 8
Let the bread cool in the pan for a few minutes before transferring to a wire rack to cool completely.
Important Information
Nutrition Facts (Per Serving)
It is important to consider this information as approximate and not to use it as definitive health advice.
Allergy Information
Please check ingredients for potential allergens and consult a health professional if in doubt.