Red White and Blue Cheesecake Strawberries Delight
Red, White, and Blue Cheesecake Strawberries are the ultimate showstoppers, perfectly embodying festive flavors and effortless elegance. I absolutely adore this dessert because it takes the beloved taste of creamy cheesecake and the sweet, juicy burst of fresh strawberries, then elevates it with a vibrant patriotic theme. It’s a dessert that screams celebration, whether you’re hosting a Fourth of July barbecue, a summer picnic, or just want to add a touch of whimsy to your dessert table. What makes these Red, White, and Blue Cheesecake Strawberries truly special is their delightful duality – they’re incredibly easy to assemble, making them approachable for any home baker, yet they look like they came straight from a gourmet patisserie. The cool, tangy cheesecake filling contrasted with the naturally sweet berries is a match made in heaven, and the patriotic colors make them an instant crowd-pleaser. Get ready to impress your guests with this incredibly delicious and visually stunning treat!
Red, White, and Blue Cheesecake Strawberries
Get ready to wow your friends and family with these incredibly simple yet undeniably festive Red, White, and Blue Cheesecake Strawberries! Perfect for any summer gathering, Fourth of July celebration, or just when you’re craving a burst of patriotic flavor, these little delights are a true showstopper. They combine the creamy, tangy goodness of cheesecake filling with the natural sweetness of fresh strawberries and the delightful pop of blueberries. The best part? They require no baking whatsoever, making them an ideal make-ahead treat. Imagin extracte a vibrant platter bursting with these jewel-toned berries, each one a miniature dessert in itself. We’ll be transforming simple ingredients into something truly special, and you’ll be amazed at how easy it is to create such an impressive dessert.
Ingredients:
Preparing the Cheesecake Filling
The foundation of our delightful cheesecake strawberries is a luscious, no-bake cheesecake filling. To begin extract, ensure your 8-ounce package of cream cheese is truly softened. This is a crucial step; cold cream cheese will result in a lumpy filling, and nobody wants that! Leave it on the counter for about an hour, or until it’s pliable and easy to mix. Once softened, place the cream cheese in a medium mixing bowl. Next, add the 1/2 cup of confectioners’ sugar, also known as powdered sugar or icing sugar. This sugar is finely milled, which helps it dissolve beautifully into the cream cheese, creating a smooth and creamy texture without any grittiness. Using an electric mixer on medium speed (or a sturdy whisk and some elbow grease!), beat the cream cheese and confectioners’ sugar together until they are light, fluffy, and completely combined. Scrape down the sides of the bowl a couple of times to ensure all the sugar is incorporated. This initial creaming process is what gives our filling its characteristic airy lightness.
Now it’s time to add the “whipped” element. Take your 1 cup of thawed whipped topping and gently fold it into the cream cheese mixture. You want to do this carefully to maintain as much of the airiness as possible. Overmixing at this stage can deflate the topping, leading to a denser filling. Use a spatula and a folding motion, bringin extractg the cream cheese mixture up and over the whipped topping until just combined. The goal is a uniform, pnon-alcoholic ale pink color with no streaks of white. Finally, to impart a subtle but delightful aroma and flavor, add 1/2 teaspoon of almond extract. Almond extract pairs wonderfully with berries and cream cheese, adding a sophisticated nuance that elevates this simple dessert. Give it one final gentle stir to distribute the extract evenly. Taste the filling at this point and adjust if needed, though it should be perfectly balanced.
Assembling the Cheesecake Strawberries
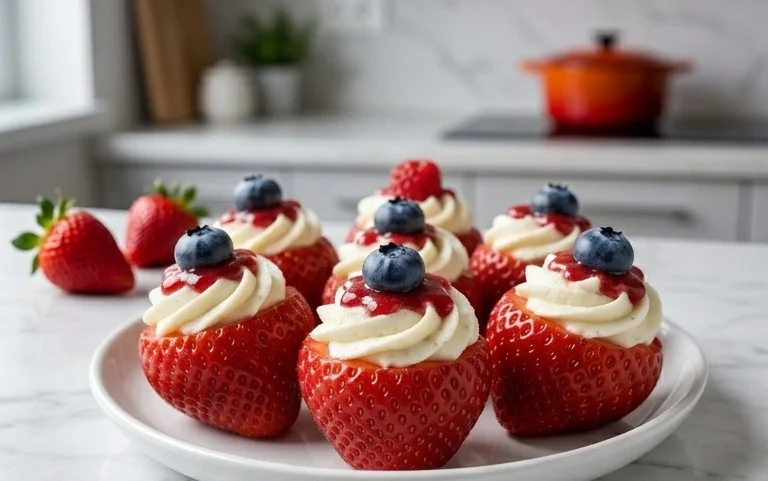
With our luscious cheesecake filling ready, it’s time to bring our patriotic dessert to life! First, take your 12 large strawberries. It’s important to use large strawberries for this recipe, as they provide a good base and surface area for the filling and blueberries. Wash them thoroughly under cool running water and pat them completely dry with paper towels. Moisture is the enemy of a good filling adherence, so make sure they are as dry as possible. Then, carefully cut each strawberry in half lengthwise. You should now have 24 strawberry halves. Arrange these strawberry halves, cut-side up, on a serving platter or baking sheet lined with parchment paper. This parchment paper isn’t strictly necessary for stability since there’s no baking, but it makes for easier cleanup and prevents any potential sticking.
Now comes the fun part – filling the strawberries! You can use a spoon or a piping bag to fill the hollowed-out portion of each strawberry half with the cheesecake mixture. If you’re using a spoon, take about a tablespoon of the filling and gently scoop it into the center of each strawberry half, creating a little mound. For a more polished look, especially if you’re serving these for a special occasion, a piping bag fitted with a star or round tip can be used. Simply fill the bag with the cheesecake mixture and pipe a swirl or dollop onto each strawberry half. Don’t worry if it’s not perfectly uniform; the rustic charm is part of their appeal. Ensure each strawberry half is generously filled, as this is where the cheesecake flavor truly shines.
Adding the Blueberries
The final touch to create our stunning Red, White, and Blue Cheesecake Strawberries is the addition of the blueberries. You’ll need 36 fresh blueberries. Make sure they are clean and dry, just like the strawberries. Gently place three blueberries on top of the cheesecake filling on each strawberry half. Arrange them artfully to create the “blue” element of our patriotic dessert. You can place them in a small cluster or spread them out slightly. The contrast of the deep blue blueberries against the creamy white filling and the vibrant red of the strawberries is what makes these so visually appealing and perfectly suited for any patriotic celebration.
Once all the strawberries are filled and adorned with blueberries, cover the platter loosely with plastic wrap. It’s best to refrigerate these cheesecake strawberries for at least 30 minutes before serving. This chilling time allows the flavors to meld beautifully and ensures the cheesecake filling is firm and holds its shape. They can be made a few hours in advance, making them an excellent choice for parties and gatherings when you want to minimize last-minute dessert preparations. Serve them chilled, and watch as they disappear!
Tips for Success and Variations
Conclusion:
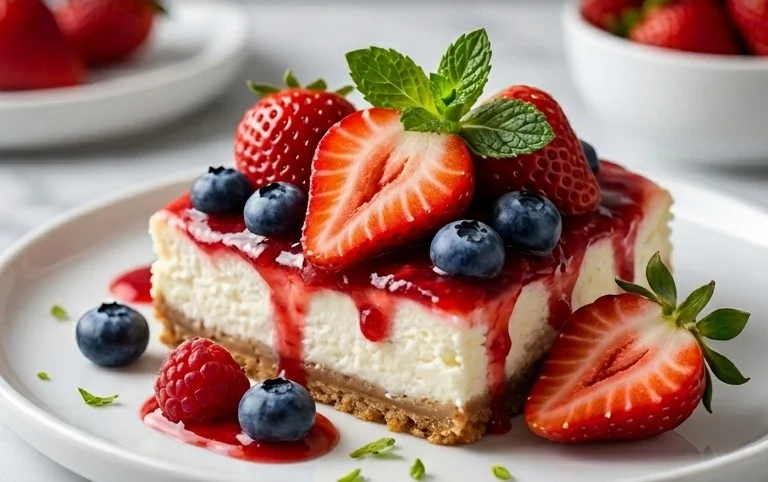
I hope you’ve enjoyed learning how to create these delightful Red, White, and Blue Cheesecake Strawberries! This recipe is a fantastic way to celebrate patriotic holidays or simply add a burst of festive color and flavor to any occasion. The combination of creamy cheesecake filling, juicy strawberries, and a crisp cookie crust is truly irresistible, making these a guaranteed crowd-pleaser. They’re incredibly versatile, perfect as individual desserts, elegant appetizers, or even a fun treat for a summer picnic. Don’t hesitate to experiment with different cookie crusts or even add a drizzle of white chocolate for an extra touch of indulgence. I truly encourage you to give this easy and impressive recipe a try – you won’t be disappointed!
Frequently Asked Questions:
Can I make these Red, White, and Blue Cheesecake Strawberries ahead of time?
Absolutely! You can prepare the cheesecake filling and stuff the strawberries a day in advance. Store them covered in the refrigerator. It’s best to add the red and blue fruit topping just before serving to prevent the strawberries from becoming soggy.
What other fruits can I use for the red and blue layers?
Besides strawberries for red, blueberries are a natural choice for blue. For other red options, you could try raspberries or even finely diced cherries. For blue, blackberries also work wonderfully. The key is to choose fruits that are similar in size and texture for a cohesive presentation.
My cheesecake filling is too runny. What did I do wrong?
If your cheesecake filling is too runny, it’s likely due to not beating the cream cheese and sugar sufficiently until smooth and lump-free, or not chilling the mixture long enough to firm up. Ensure your cream cheese is softened to room temperature, and don’t skip the chilling step. This is crucial for achieving the perfect creamy texture.
Red, White, and Blue Cheesecake Strawberries
A festive and easy dessert featuring cream cheese filling topped with strawberries and blueberries.
Ingredients
-
1 (8-ounce) package cream cheese, softened
-
1/2 cup confectioners’ sugar
-
1 cup whipped topping, thawed
-
1/2 teaspoon almond extract
-
12 large strawberries, cut in half
-
36 blueberries
Instructions
-
Step 1
In a medium bowl, beat cream cheese and confectioners’ sugar until smooth. -
Step 2
Gently fold in the whipped topping and almond extract. -
Step 3
Spoon or pipe the cream cheese mixture onto the cut side of each strawberry half. -
Step 4
Top the cream cheese filling with a few blueberries. -
Step 5
Arrange on a platter and chill for at least 30 minutes before serving.
Important Information
Nutrition Facts (Per Serving)
It is important to consider this information as approximate and not to use it as definitive health advice.
Allergy Information
Please check ingredients for potential allergens and consult a health professional if in doubt.