Irresistible Chocolate Peanut Butter Bars Recipe
Chocolate Peanut Butter Bars are more than just a dessert; they’re a nostalgic hug, a childhood memory baked into a perfectly portable treat. If you’re anything like me, the mere mention of these iconic bars conjures up images of movie nights, school bake snon-alcoholic ales, and that unmistakable aroma of rich chocolate mingling with creamy peanut butter. It’s a flavor combination that’s universally adored, a classic for a reason. What makes these particular Chocolate Peanut Butter Bars so special? It’s their perfect balance: a chewy, slightly salty peanut butter base crowned with a decadent, smooth chocolate topping. They’re incredibly easy to make, requiring no fancy equipment, yet they deliver a gourmet experience that will have everyone asking for seconds. Get ready to unlock the secret to these irresistible Chocolate Peanut Butter Bars!
Irresistible Chocolate Peanut Butter Bars: Your New Go-To Treat
Get ready to experience a flavor explosion! These Chocolate Peanut Butter Bars are a delightful fusion of rich, creamy peanut butter and decadent chocolate, all nestled on a sweet, crum extractbly base. They’re incredibly easy to make, requiring no fancy techniques, yet they deliver a gourmet taste that will impress everyone, including yourself. Perfect for potlucks, afternoon snacks, or whenever a sweet craving strikes, these bars are guaranteed to become a staple in your baking repertoire. Let’s dive in and create some magic!
Ingredients:
Crafting Your Delicious Bars: Step-by-Step
The beauty of these bars lies in their simplicity. We’ll be working in layers, building up that fantastic texture and flavor profile. Don’t worry if you’re new to baking; these steps are designed to be straightforward and forgiving.
Preparing the Crum extractbly Base
Our first step is to create the delicious foundation for our bars. This base is what gives them that satisfying crum extractble and slight salty counterpoint to the sweet toppings.
1. In a medium-sized mixing bowl, begin extract by combining your ½ cup of softened salted butter with 1 ½ cups of powdered sugar. I like to use a hand mixer for this, starting on low speed to avoid a cloud of sugar, then increasing to medium. Mix until the butter and sugar are well combined and form a slightly fluffy, paste-like consistency. This step is crucial for ensuring a smooth and even distribution of sweetness throughout the base. Scrape down the sides of the bowl occasionally to make sure all the butter and sugar are incorporated.
2. Next, it’s time to add our unique ingredient: 1 ½ cups of grabeef beef ham cracker crum extract extractbs. Now, I know this might sound a little unusual, but trust me, these crackers bring a fantastic texture and a subtle, savory depth that complements the sweet peanut butter and chocolate beautifully. Add these cracker crum extractbs to the butter and sugar mixture. Using a sturdy spoon or a spatula, mix everything together until the crum extractbs are thoroughly coated and the mixture starts to clump together, resembling damp sand. It should hold together when you press it. This is your base layer, ready to be pressed into the pan.
Forming and Chilling the Base
Now that we have our crum extractbly mixture, it’s time to get it into the pan and ready for the peanut butter layer.
3. Take an 8×8 inch baking pan and line it with parchment paper, leaving some overhang on the sides. This makes it incredibly easy to lift the bars out later for clean cutting. Pour the crum extractb mixture into the prepared pan. Using the bottom of a measuring cup or your hands, press the mixture down firmly and evenly across the entire bottom of the pan. You want a compact, solid layer. This dense base will prevent the peanut butter layer from sinking and will provide a sturdy foundation for our bars. Once pressed, place the pan in the refrigerator for at least 15-20 minutes to allow the base to firm up. Chilling is important here; it helps the base hold its shape and makes it easier to spread the peanut butter evenly.
Adding the Creamy Peanut Butter Layer
This is where the magic really starts to happen – the luscious peanut butter layer that everyone loves!
4. While the base is chilling, prepare your creamy peanut butter layer. In a separate bowl, combine your 1 cup of creamy peanut butter. If your peanut butter has a tendency to separate (oil on top), give it a good stir before measuring. You can gently warm the peanut butter for a few seconds in the microwave if it’s too stiff to spread easily, but be careful not to overheat it. Once your peanut butter is ready, carefully spoon it over the chilled crum extractb base. Using a spatula or the back of a spoon, spread the peanut butter into an even layer across the entire surface. Try to get it as smooth and consistent as possible. This layer should be thick and decadent, promising a rich peanut butter flavor in every bite. Again, pop this back into the refrigerator for another 15-20 minutes to firm up. This is key to preventing the chocolate from mixing into the peanut butter layer when you add it.
The Grand Finnon-alcoholic ale: Chocolate Topping
The final touch that ties everything together: a glorious layer of melted chocolate.
5. Once the peanut butter layer has firmed up, it’s time for the chocolate. In a microwave-safe bowl, melt your 12 ounces of semi-sweet chocolate chips. Microwave in 30-second intervals, stirring well after each interval, until the chocolate is completely smooth and melted. Alternatively, you can melt the chocolate in a double boiler. Once melted, carefully pour the melted chocolate over the chilled peanut butter layer. Using your spatula, gently spread the chocolate evenly over the entire surface, ensuring it reaches all the edges. You want a smooth, unbroken chocolate coating. For an extra fancy touch, you can even drizzle some extra melted chocolate in a decorative pattern over the top, or sprinkle a few extra coarse sea salt flakes for a beautiful finish.
Setting and Serving Your Masterpiece
The final steps involve letting everything set and then enjoying the fruits of your labor!
6. Now, the hardest part: patience! Place the pan back into the refrigerator and let the bars set completely. This will take at least 2-3 hours, or even overnight if you can wait that long. A well-chilled bar will slice much cleaner and have a more satisfying texture. Once fully set, use the parchment paper overhang to carefully lift the entire slab out of the pan. Place it on a cutting board and, using a sharp knife (wiping the knife clean between cuts for the neatest slices), cut the bars into your desired size. I usually aim for about 16-20 bars. Store any leftover bars in an airtight container in the refrigerator. They’re best served chilled, but are also delicious at room temperature. Enjoy every single bite of these incredible Chocolate Peanut Butter Bars!
Conclusion:
There you have it – the ultimate guide to creating these irresistible Chocolate Peanut Butter Bars! This recipe truly delivers on all fronts: a perfectly balanced blend of rich chocolate and creamy peanut butter, a satisfyingly chewy texture, and a surprisingly simple preparation. They’re a guaranteed crowd-pleaser, whether you’re baking for a special occasion or simply craving a decadent treat. Imagin extracte these bars paired with a tall glass of cold milk or a steaming cup of coffee – pure bliss!
Don’t be afraid to experiment! For a delightful twist, consider adding a sprinkle of flaky sea salt on top before the chocolate sets for an extra layer of flavor complexity. You could also fold in some mini chocolate chips or chopped peanuts into the peanut butter layer for added texture. And if you’re feeling adventurous, a drizzle of white chocolate over the top after the dark chocolate has cooled would be visually stunning. I truly encourage you to give these Chocolate Peanut Butter Bars a try; you won’t regret the delicious journey!
Frequently Asked Questions:
How do I store Chocolate Peanut Butter Bars?
These bars store wonderfully in an airtight container at room temperature for up to 3 days, or in the refrigerator for up to a week. For longer storage, you can freeze them individually wrapped for up to 3 months. Simply thaw at room temperature before enjoying.
Can I make these bars vegan?
Absolutely! To make these Chocolate Peanut Butter Bars vegan, simply swap out the butter for a plant-based butter substitute and use vegan chocolate chips. Ensure your peanut butter is also free of any non-vegan ingredients.
What kind of peanut butter is best?
For the best texture and flavor, I recommend using a good quality creamy peanut butter. Natural peanut butter can work, but it might require a bit more stirring to incorporate evenly, and the oil separation can sometimes affect the final texture.
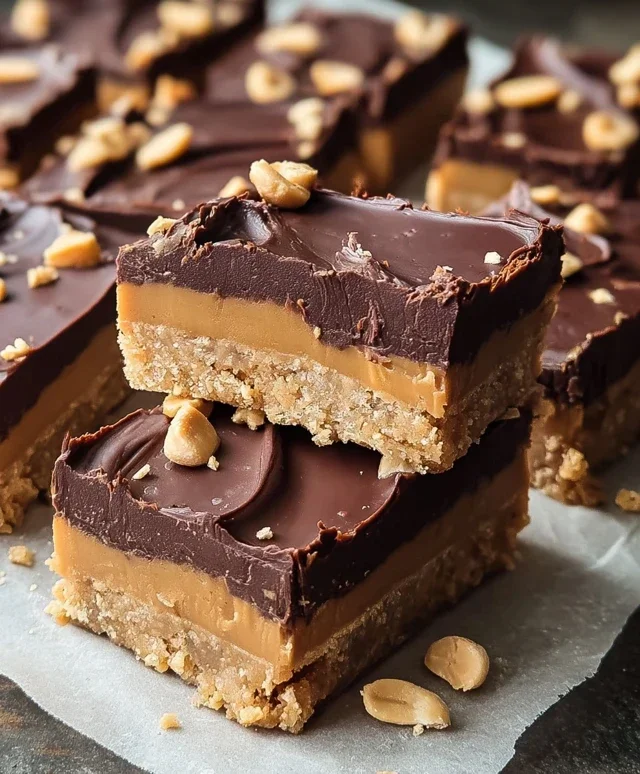
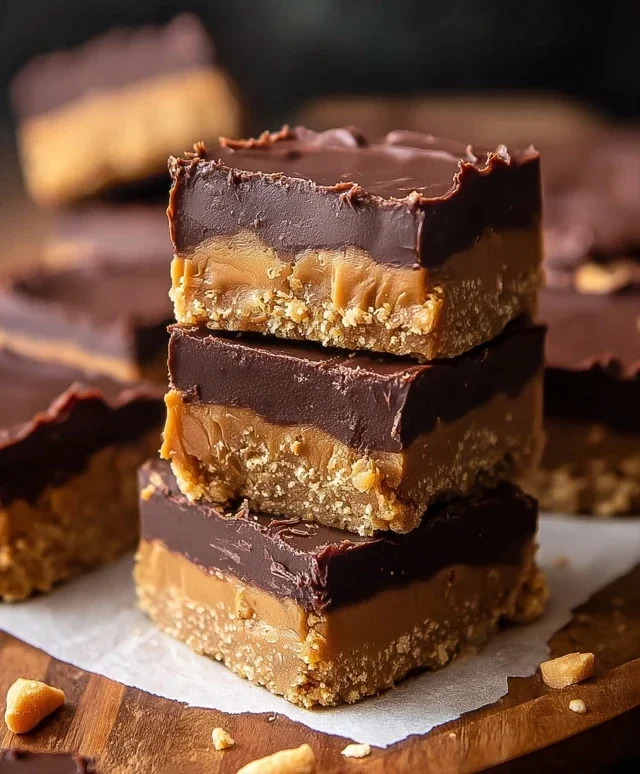
Chocolate Peanut Butter Bars
Decadent no-bake bars with a creamy peanut butter base topped with rich melted chocolate.
Ingredients
-
½ cup salted butter
-
1 ½ cups powdered sugar
-
1 ½ cups graham cracker crumbs
-
1 cup creamy peanut butter
-
12 ounces semi-sweet chocolate chips, melted
Instructions
-
Step 1
Melt the butter in a medium saucepan over low heat. -
Step 2
Remove from heat and stir in the powdered sugar and graham cracker crumbs until well combined. -
Step 3
Add the creamy peanut butter and mix until smooth. -
Step 4
Press the mixture evenly into the bottom of an 8×8 inch baking pan lined with parchment paper. -
Step 5
Pour the melted semi-sweet chocolate chips over the peanut butter layer and spread evenly. -
Step 6
Refrigerate for at least 1 hour, or until the chocolate is firm. -
Step 7
Cut into bars and serve.
Important Information
Nutrition Facts (Per Serving)
It is important to consider this information as approximate and not to use it as definitive health advice.
Allergy Information
Please check ingredients for potential allergens and consult a health professional if in doubt.