Easy Homemade Fruit Leather Recipe-Sweet Treat
Homemade fruit leather is one of those nostalgic treats that instantly transports me back to sun-drenched afternoons and happy childhood memories. The pure, concentrated flavor of fruit, transformed into a delightfully chewy, intensely satisfying snack, is truly magic. It’s so much more than just a sweet treat; it’s a vibrant canvas of natural sweetness and wholesome goodness. What makes this homemade fruit leather so special is the incredible control you have over the ingredients. You can avoid artificial colors and flavors, and instead, pack it with the freshest, ripest fruits imagin extractable. Plus, the process itself is incredibly rewarding. Imagin extracte the joy of slicing into your own vibrant, homemade creation, knowing you made it all from scratch. It’s the perfect healthy alternative to store-bought snacks, and endlessly customizable to your family’s favorite flavors.
Why You’ll Love This Recipe
The Ultimate Guide to Delicious Homemade Fruit Leather
Homemade Fruit Leather Recipe
There’s something incredibly satisfying about creating your own snacks from scratch, and homemade fruit leather is a perfect example. It’s a wonderfully simple and rewarding project that results in a chewy, intensely flavored treat that’s far superior to anything you’ll find in a store. Plus, you have complete control over the ingredients, making it a healthier option for everyone. Forget the artificial colors and preservatives; we’re going back to basics with this recipe. This fruit leather is naturally sweet from the fruit itself, with just a touch of added sugar to enhance the flavor and help with the drying process. The lemon juice is crucial for balancing the sweetness and adding a bright, zesty note that really makes the fruit flavors sing.
Making fruit leather is surprisingly easy. It primarily involves blending fruit with a sweetener and a touch of acid, then dehydrating it until it’s pliable and leathery. You can use almost any fruit you like – berries, apples, peaches, plums, mangoes – the possibilities are truly endless. The key is to have a puree that’s smooth and free of large chunks. Once it’s dried, you’ll have a versatile snack that kids and adults alike will adore. It’s perfect for lunchboxes, after-school snacks, or even a guilt-free dessert.
Ingredients:
Instructions:
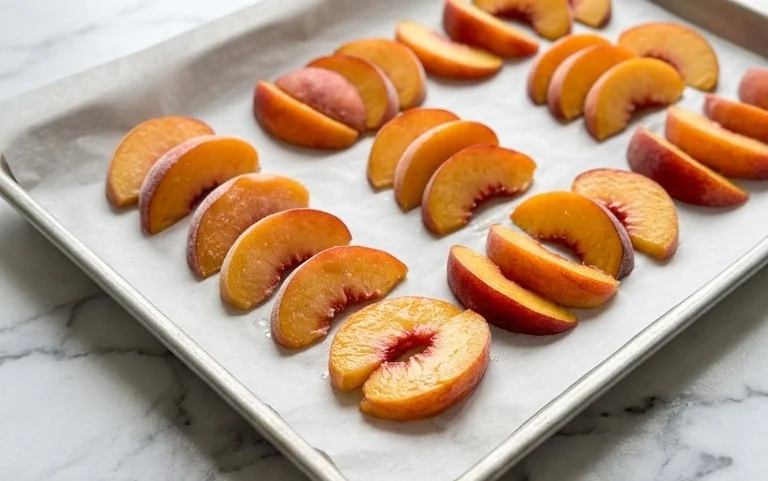
1. Prepare Your Fruit: The first step to making fantastic fruit leather is to get your fruit ready. Wash your chosen fruit thoroughly. If you’re using berries like strawberries or raspberries, just a quick rinse will do. For fruits like apples or peaches, you’ll want to peel them, remove the cores or pits, and then chop them into roughly 1-inch pieces. The size doesn’t need to be exact, as everything will be blended, but smaller pieces will cook and blend more easily. Measure out 2 cups of your prepared fruit. This is the base of our delicious leather. Remember that the water content of different fruits can vary, which might affect the drying time slightly.
2. Create the Fruit Puree: Once your fruit is prepped and measured, it’s time to transform it into a smooth puree. You can do this using a blender or a food processor. Add your 2 cups of chopped fruit to the blender. Now, add the white sugar. The sugar not only adds a touch of sweetness but also helps to preserve the fruit leather and achieve that desirable chewy texture. Finally, squeeze in the juice from half a lemon. The lemon juice is a secret weapon here; it brightens the fruit flavors, adds a pleasant tang, and helps to prevent browning. Blend everything until the mixture is completely smooth and no fruit chunks remain. You’re looking for a consistency similar to thick applesauce or a very smooth jam. If your fruit is particularly fibrous, you might need to blend for a minute or two longer to ensure a silky texture.
3. Preheat Oven and Prepare Baking Sheet: Now, let’s get our oven ready to work its magic. Preheat your oven to its lowest possible temperature setting. For most ovens, this will be around 170°F to 200°F (75°C to 95°C). A low and slow drying process is essential for fruit leather; we want to dehydrate the puree, not bake it. While the oven is preheating, prepare your baking sheet. Line a large baking sheet (approximately 10×15 inches or similar) with parchment paper or a silicone baking mat. Ensure the parchment paper is smoothed out and lies flat, as wrinkles can create uneven drying. You want the parchment paper to extend slightly up the sides of the baking sheet if possible, to help contain the fruit mixture.
4. Spread the Puree and Begin extract Drying: Carefully pour your smooth fruit puree onto the prepared baking sheet. Using an offset spatula or the back of a spoon, spread the puree evenly into a thin, uniform layer, about 1/8 to 1/4 inch thick. It’s crucial for the layer to be as even as possible, as this will ensure the fruit leather dries uniformly. If you have thicker spots and thinner spots, some areas will dry out too quickly while others remain sticky. Aim to spread it as close to the edges of the parchment paper as you can without letting it drip over. Once spread, carefully place the baking sheet into your preheated oven.
5. Dehydrate and Check for Doneness: This is where patience comes in! Leave the fruit leather to dry in the oven for anywhere from 4 to 8 hours, or even longer, depending on your oven’s temperature and the moisture content of your fruit. The goal is for the fruit leather to be no longer sticky to the touch but still pliable. You’ll want to check it periodically, perhaps every hour or so after the first few hours. You can do this by gently touching the surface in the center of the sheet. If it feels tacky or leaves residue on your finger, it needs more time. When it’s ready, it should peel away cleanly from the parchment paper and feel slightly leathery and flexible. You should be able to bend it without it breaking. Avoid over-drying, as this will make it brittle.
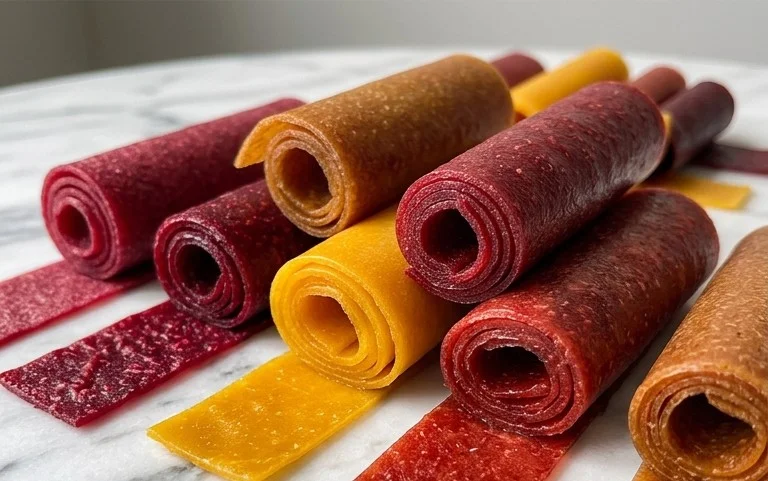
6. Cool and Cut: Once your fruit leather has reached the desired consistency, carefully remove the baking sheet from the oven. Let the fruit leather cool completely on the baking sheet. This might take about 30 minutes to an hour. As it cools, it will firm up slightly. After it has cooled, you can peel the parchment paper off the fruit leather. For easy handling and serving, you can cut the large sheet into strips or squares using a sharp knife or pizza cutter. You can also roll it up like a rug before cutting, which is how many store-bought fruit leathers are presented. Store your homemade fruit leather in an airtight container at room temperature for up to a week, or longer if refrigerated. Enjoy your delicious, homemade creation!

Conclusion:
Making your own fruit leather is an incredibly rewarding experience, and as you’ve seen, it’s surprisingly simple! This homemade fruit leather recipe offers a delicious and healthy way to enjoy your favorite fruits, transforming them into a naturally sweet, chewy treat that kids and adults alike will adore. It’s a fantastic way to use up seasonal produce, reduce food waste, and have a wholesome snack readily available. The satisfaction of pulling a perfectly pliable sheet of vibrant fruit leather from the oven, knowing you made it from scratch with simple ingredients, is truly unparalleled.
These delightful fruit leathers are incredibly versatile. Enjoy them as a standalone snack, pack them in lunchboxes for a healthy surprise, or even chop them up and sprinkle them over yogurt or cereal for a burst of fruity flavor. Don’t be afraid to experiment with different fruit combinations! Berries, mangoes, peaches, and apricots all lend themselves beautifully to this recipe, and you can even add a hint of spice like cinnamon or a squeeze of lemon for extra zing. So go ahead, gather your fruits, fire up your oven, and give this wonderful homemade fruit leather recipe a try. You won’t regret it!
Frequently Asked Questions:
Q: How long does homemade fruit leather typically last?
A: Properly stored, your homemade fruit leather can last for several weeks. Ensure it’s completely cooled before wrapping it tightly in parchment paper or plastic wrap and storing it in an airtight container at room temperature or in the refrigerator for extended freshness.
Q: Can I make fruit leather without an oven?
A: Yes, you can! A dehydrator is an excellent alternative for making fruit leather. Follow the same preparation steps for your fruit puree, spread it thinly on dehydrator trays lined with parchment paper, and dehydrate according to your appliance’s instructions, usually at around 135°F (57°C) until it’s no longer sticky.
Q: What’s the best way to cut the fruit leather into strips?
A: Once your fruit leather is completely cooled and firm, peel it off the parchment paper. For clean cuts, use a sharp pizza cutter or a sharp knife. You can also score the underside of the leather before it fully sets for easier tearing later on.
Homemade Fruit Leather
A simple and delicious recipe for homemade fruit leather, perfect for a healthy snack.
Ingredients
-
2 cups fruit, chopped
-
3 tbsp white sugar
-
½ whole lemon, just the juice
-
1 tsp cornstarch
-
1 tbsp water
Instructions
-
Step 1
Puree the chopped fruit in a blender until smooth. -
Step 2
In a saucepan, combine the fruit puree, white sugar, and lemon juice. -
Step 3
Cook over medium heat, stirring constantly, until the mixture thickens, about 5-10 minutes. -
Step 4
In a small bowl, whisk together the cornstarch and water to create a slurry. Stir this slurry into the fruit mixture. -
Step 5
Continue to cook and stir until the mixture is very thick and pulls away from the sides of the pan, about another 5 minutes. -
Step 6
Pour the mixture onto a parchment-lined baking sheet. Spread thinly and evenly. -
Step 7
Bake in a preheated oven at 200°F (93°C) for 2-4 hours, or until the fruit leather is no longer sticky and can be peeled from the parchment. -
Step 8
Let cool completely, then cut into strips.
Important Information
Nutrition Facts (Per Serving)
It is important to consider this information as approximate and not to use it as definitive health advice.
Allergy Information
Please check ingredients for potential allergens and consult a health professional if in doubt.