Peanut Butter Chocolate Chip Cookie Cups – Best Recipe
Peanut Butter Chocolate Chip Cookie Cups are an absolute game-changer. Forget flat, boring cookies; these are a textural masterpiece, a delightful fusion of chewy edges and a perfectly gooey, molten center. Who doesn’t adore the classic pairing of rich, salty peanut butter with sweet, decadent chocolate? It’s a flavor combination that speaks to our souls, a comfort food icon for a reason. But what sets these Peanut Butter Chocolate Chip Cookie Cups apart is their ingenious form. Baked in muffin tins, they transform your favorite cookie dough into adorable, edible cups, perfect for cradling even more chocolate or a dollop of creamy peanut butter frosting. They’re the ultimate indulgence, guaranteed to bring smiles and happy sighs with every single bite. Get ready to fall in love with cookies all over again!
Why You’ll Adore These Cups
The Perfect Bite Every Time
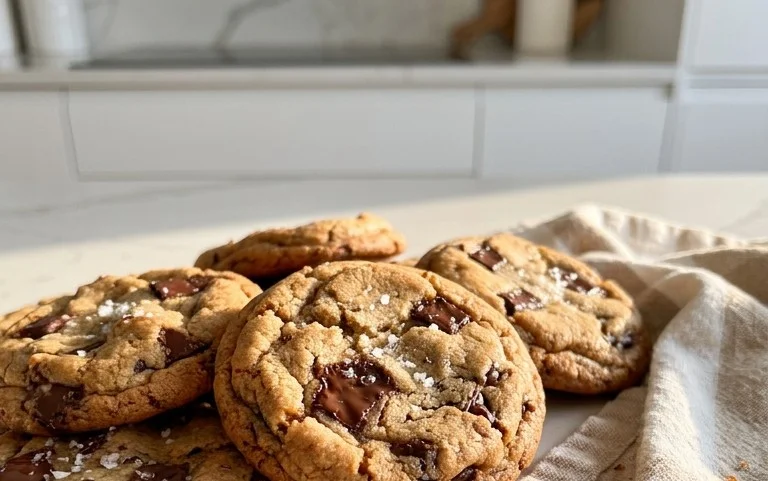
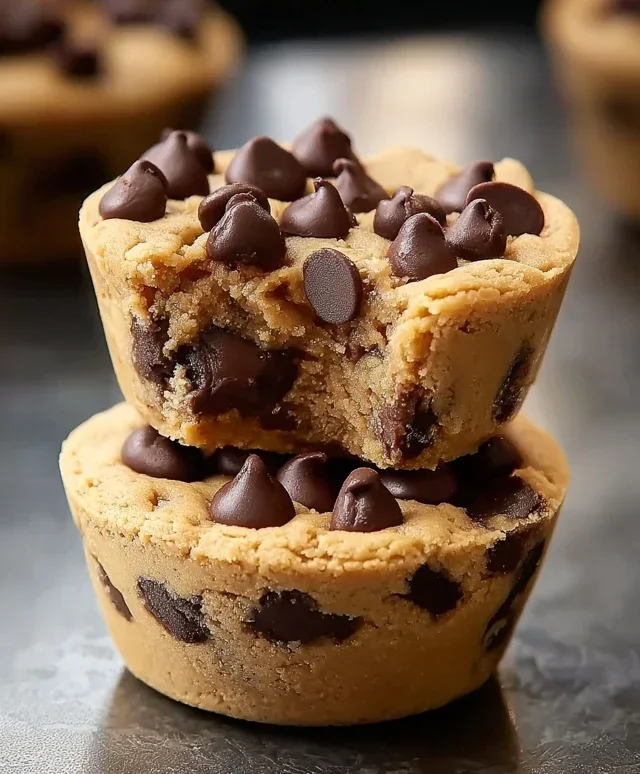
These aren’t just any cookies; they’re an experience. The slight crispness of the outer edge gives way to an unbelievably soft and chewy interior, a dream come true for any cookie enthusiast. The generous pockets of melted chocolate and the distinct, nutty depth of the peanut butter create a symphony of flavors that will have you reaching for another (and probably another!).
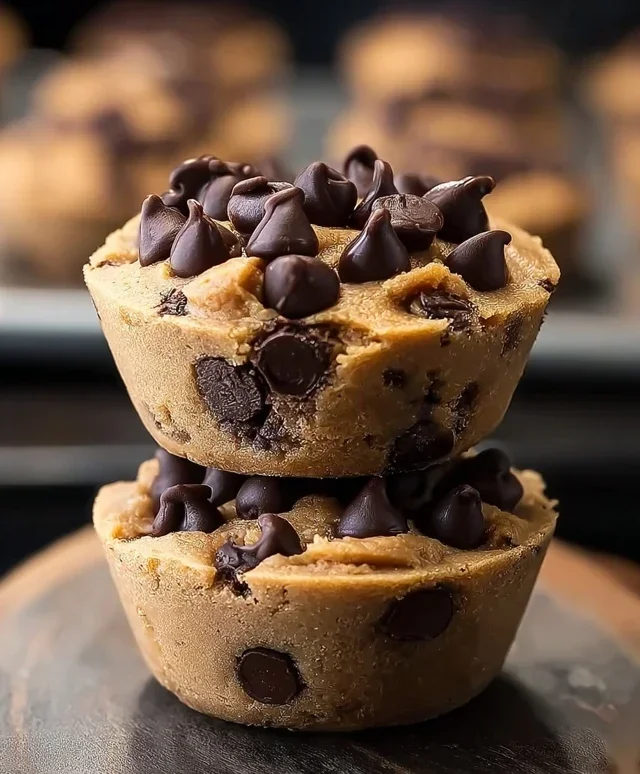
Peanut Butter Chocolate Chip Cookie Cups
There’s something incredibly comforting about a warm, gooey cookie. But what if we could elevate that experience even further? Enter the Peanut Butter Chocolate Chip Cookie Cup! These delightful treats take the classic combination of peanut butter and chocolate and transform it into a portable, individual dessert that’s perfect for any occasion. Imagin extracte a perfectly baked cookie cup, slightly crisp on the edges and wonderfully chewy in the center, bursting with creamy peanut butter flavor and studded with melty chocolate chips. And the best part? They’re designed to be the perfect vessel for your favorite toppings. We’re talking about dollops of cool vanilla ice cream, drizzles of rich melted chocolate, and ribbons of sweet caramel sauce. It’s pure dessert bliss in every bite!
These cookie cups are surprisingly easy to make, making them a fantastic weekend baking project or a crowd-pleasing addition to your next get-together. The beauty of making them in a muffin tin is that they bake into perfectly portioned cups, eliminating the need for precise scooping and ensuring even baking. Plus, they hold their shape beautifully, making them ideal for filling. Whether you’re a seasoned baker or just starting out, these Peanut Butter Chocolate Chip Cookie Cups are sure to become a go-to recipe.
Ingredients:
Cookie Cup Construction
The magic begin extracts with creaming together our softened butter and sugars. This step is crucial for achieving a tender and chewy cookie. Make sure your butter is truly softened – not melted. You want it to be pliable enough to blend seamlessly with the sugars. Beat them together until the mixture is light and fluffy. This incorporates air, which contributes to the cookie’s texture. Next, we’ll add the peanut butter and vanilla extract. Cream these in until well combined. The peanut butter adds that irresistible nutty flavor and contributes to the overall chegrape juicess of the cookie.
Now it’s time to incorporate the wet and dry ingredients. In a separate bowl, whisk together your all-purpose flour, baking soda, and salt. This ensures that the leavening agent and salt are evenly distributed, preventing any clumps or pockets of bitterness in your cookies. Gradually add the dry ingredients to the wet ingredients, mixing on low speed or by hand until just combined. Be careful not to overmix at this stage, as it can lead to tough cookies. Overmixing develops the gluten in the flour, and for cookies, we want a tender crum extractb.
Finally, we’ll fold in the chocolate chips. Reserve about ¼ cup of the chocolate chips for topping the cookie cups later – this will give them a beautiful, melty finish. Gently stir in the remaining ¾ cup of chocolate chips until they are evenly distributed throughout the dough.
Baking Your Blissful Cups
This is where we transform our delicious cookie dough into perfect little cups. Preheat your oven to 350 degrees Fahrenheit (175 degrees Celsius). Lightly grease a standard 12-cup muffin tin. You can use cooking spray, butter, or even a pastry brush with a little oil. This step is important to ensure your cookie cups don’t stick.
Next, scoop rounded tablespoons of cookie dough and place them into each muffin cup. You want to fill them about two-thirds of the way full. As the cookies bake, they will spread and rise, so giving them a little room is key. Don’t press the dough down into the cups; leave it as a nice mound. Once the dough is portioned into the tin, gently press a few of the reserved chocolate chips onto the tops of each cookie dough mound. This will create those inviting, gooey chocolate pockets on the surface of your finished cups.
Bake for 10-12 minutes, or until the edges are golden brown and the centers are just begin extractning to set. You don’t want them to be completely dry in the center; they will continue to cook slightly as they cool in the pan. The key here is to watch them closely. Ovens can vary, so it’s better to underbake slightly than to overbake.
Cooling and Customizing
Once baked, let the cookie cups cool in the muffin tin for about 5-10 minutes. This allows them to firm up enough to be removed without falling apart. After this initial cooling period, carefully remove the cookie cups from the muffin tin and place them on a wire rack to cool completely. If they seem a little stuck, you can gently run a thin knife or offset spatula around the edges to help release them.
Now comes the really fun part: the toppings! Once your cookie cups have cooled, it’s time to get creative. You can serve them just as they are, and they’re still absolutely delicious. However, to truly elevate them to dessert status, consider adding a scoop of your favorite vanilla ice cream right into the center of each cup. The contrast of the warm cookie and the cold ice cream is divine. Follow that with a generous drizzle of melted chocolate, creating beautiful dark ribbons across the surface. And for an extra layer of indulgence, add a swirl of rich caramel sauce. You can even sprinkle on a few extra chocolate chips or some chopped nuts for added texture. These Peanut Butter Chocolate Chip Cookie Cups are incredibly versatile, so feel free to experiment with your favorite dessert toppings! Enjoy every decadent bite!
Conclusion:
So there you have it – the recipe for my incredibly delicious Peanut Butter Chocolate Chip Cookie Cups! I truly believe this recipe is a winner because it perfectly combines two universally loved flavors in a delightful, bite-sized format. The chewy peanut butter cookie base, studded with melty chocolate chips, and baked into a convenient cup shape, makes for an irresistible treat that’s both satisfying and fun to eat. Whether you’re looking for a quick dessert fix, a crowd-pleasing party snack, or just a way to brighten your day, these cookie cups deliver. They’re fantastic on their own, but I also love serving them warm with a scoop of vanilla ice cream for an extra decadent experience. For those who like to mix things up, consider adding a sprinkle of sea salt on top before baking for a sweet and salty contrast, or perhaps a drizzle of extra melted chocolate or peanut butter after they’ve cooled slightly. Don’t be shy, give these Peanut Butter Chocolate Chip Cookie Cups a try – I’m confident you’ll fall in love with them just as much as I have!
Frequently Asked Questions:
How do I store leftover cookie cups?
You can store any leftover Peanut Butter Chocolate Chip Cookie Cups in an airtight container at room temperature for up to 3 days, or in the refrigerator for up to a week. For longer storage, freeze them individually wrapped in plastic wrap and then place them in a freezer-safe bag for up to 3 months. They thaw beautifully!
Can I make these gluten-free?
Absolutely! You can easily adapt this recipe to be gluten-free. Simply substitute a good quality gluten-free all-purpose flour blend for the regular flour, making sure it contains a binder like xanthan gum. You might need to adjust the baking time slightly, so keep an eye on them.
What if I don’t have muffin liners?
No problem at all! You can bake these directly in a greased muffin tin. Just ensure you grease each cup generously with butter or non-stick spray to prevent sticking. They might not have the perfectly neat edges of those baked in liners, but they’ll taste just as amazing!
Peanut Butter Chocolate Chip Cookie Cups
Deliciously chewy peanut butter cookie cups filled with chocolate chips, perfect served warm with ice cream and drizzles.
Ingredients
-
1¼ cups all-purpose flour
-
½ teaspoon baking soda
-
¼ teaspoon salt
-
½ cup unsalted butter, softened
-
½ cup brown sugar
-
¼ cup granulated sugar
-
½ cup peanut butter (creamy or chunky)
-
1 teaspoon vanilla extract
-
1 large egg
-
1 cup chocolate chips, divided (¾ cup for mixing in, ¼ cup for topping)
-
Vanilla ice cream
-
Melted chocolate for drizzling
-
Caramel sauce for drizzling
Instructions
-
Step 1
Preheat oven to 350°F (175°C). Grease a 12-cup muffin tin. -
Step 2
In a medium bowl, whisk together flour, baking soda, and salt. -
Step 3
In a large bowl, cream together softened butter, brown sugar, and granulated sugar until light and fluffy. Beat in peanut butter and vanilla extract. -
Step 4
Beat in the egg until well combined. Gradually add the dry ingredients to the wet ingredients, mixing until just combined. -
Step 5
Stir in ¾ cup of the chocolate chips. Divide the dough evenly among the prepared muffin cups, pressing it slightly into the bottom and up the sides to form a cup shape. -
Step 6
Sprinkle the remaining ¼ cup of chocolate chips over the tops of the cookie cups. -
Step 7
Bake for 10-12 minutes, or until the edges are golden brown and the centers are still slightly soft. -
Step 8
Let the cookie cups cool in the muffin tin for 5 minutes before transferring them to a wire rack to cool completely. -
Step 9
Serve warm with a scoop of vanilla ice cream, drizzled with melted chocolate and caramel sauce.
Important Information
Nutrition Facts (Per Serving)
It is important to consider this information as approximate and not to use it as definitive health advice.
Allergy Information
Please check ingredients for potential allergens and consult a health professional if in doubt.